Vertex Color Blending in Unreal 5
Two of my favorite games are Tunic and Death’s Door, I really like the top down camera and the general low poly/hand painted aesthetic. On my last playthrough of Tunic, I noticed how they render the ground textures, specifically how they draw paths on the ground planes. There was a livestream where the creator, Andrew Shouldice, said that he achieves that effect by using vertex colors to change the textures. I wanted to see if I could replicate that effect in Unreal 5.
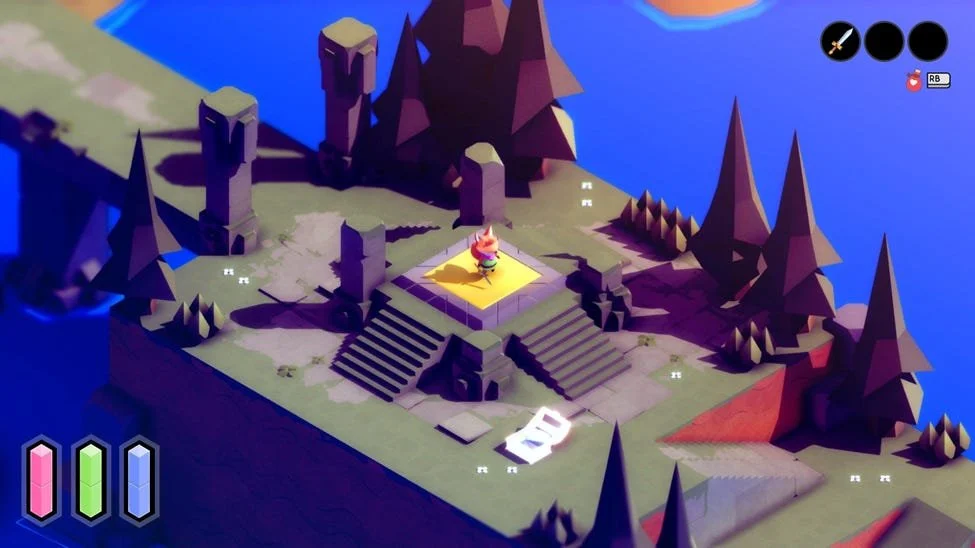
Perfect example of the grey tiles blending with the green grass in Tunic.
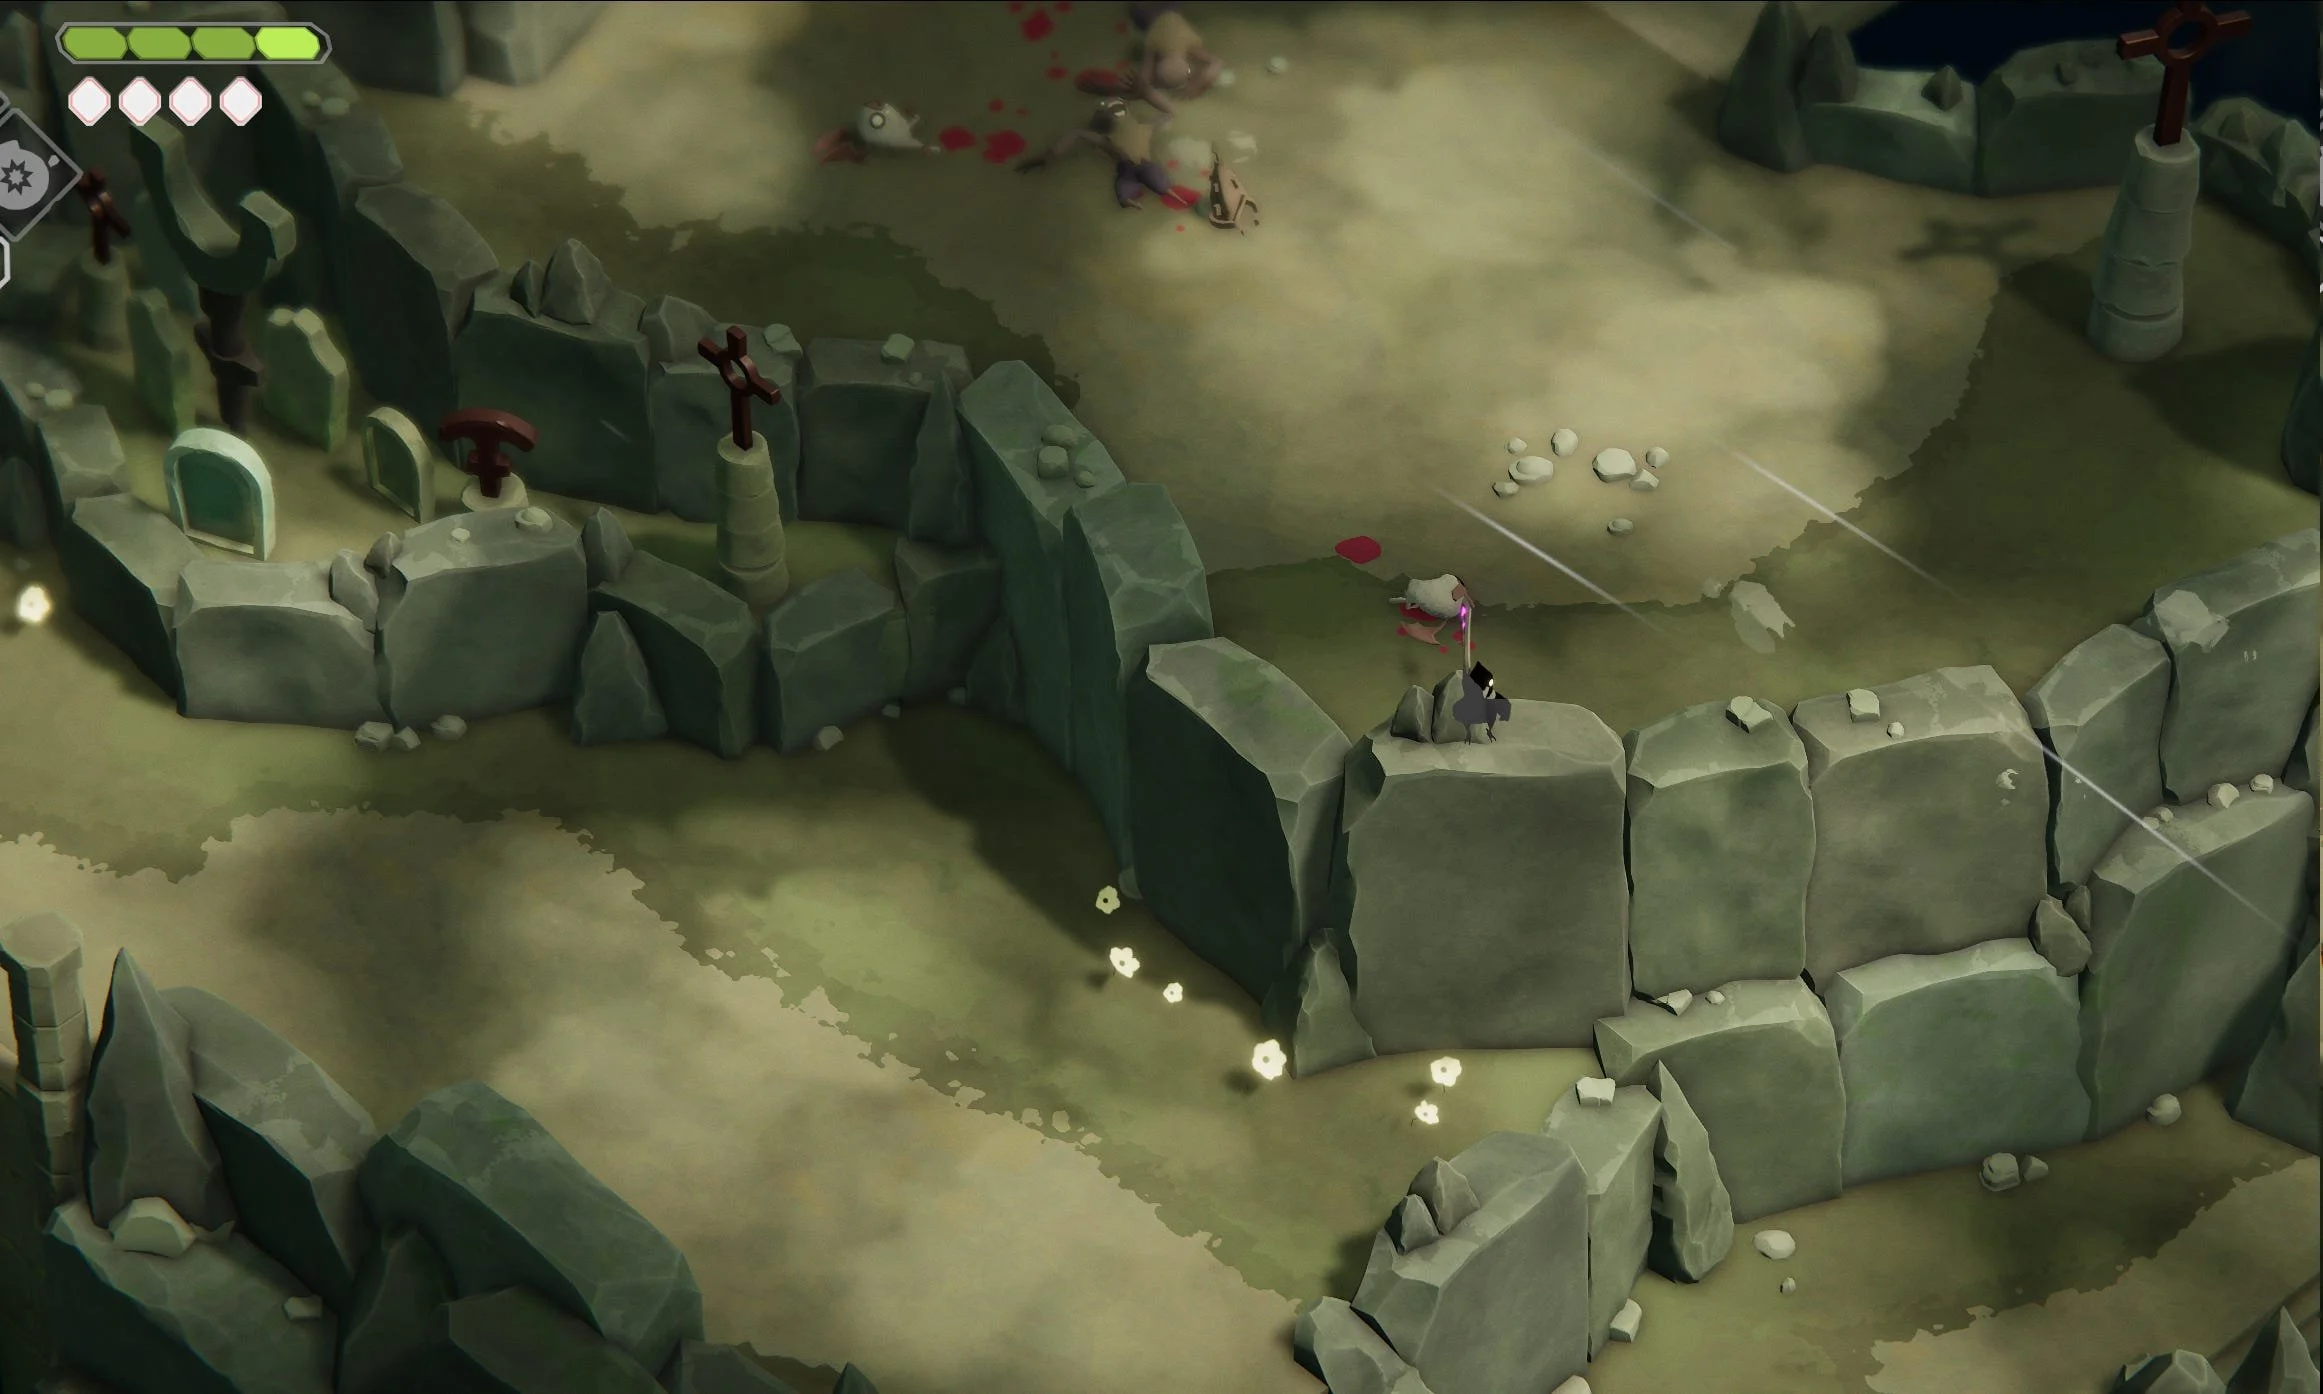
I really like how “frayed” the edges of the paths are in Death’s Door. Some of the color variation comes from a cloud effect which moves during gameplay.
My first step was to start off small by lerping between two diffuse textures based on the red channel. I chose to set the textures to world coordinates because I want the material to work on irregular shapes for the ground and I want to be able to scale the ground plane without worrying about my UVs breaking. Spoilers: I think it’s better to just do it all in UV space.
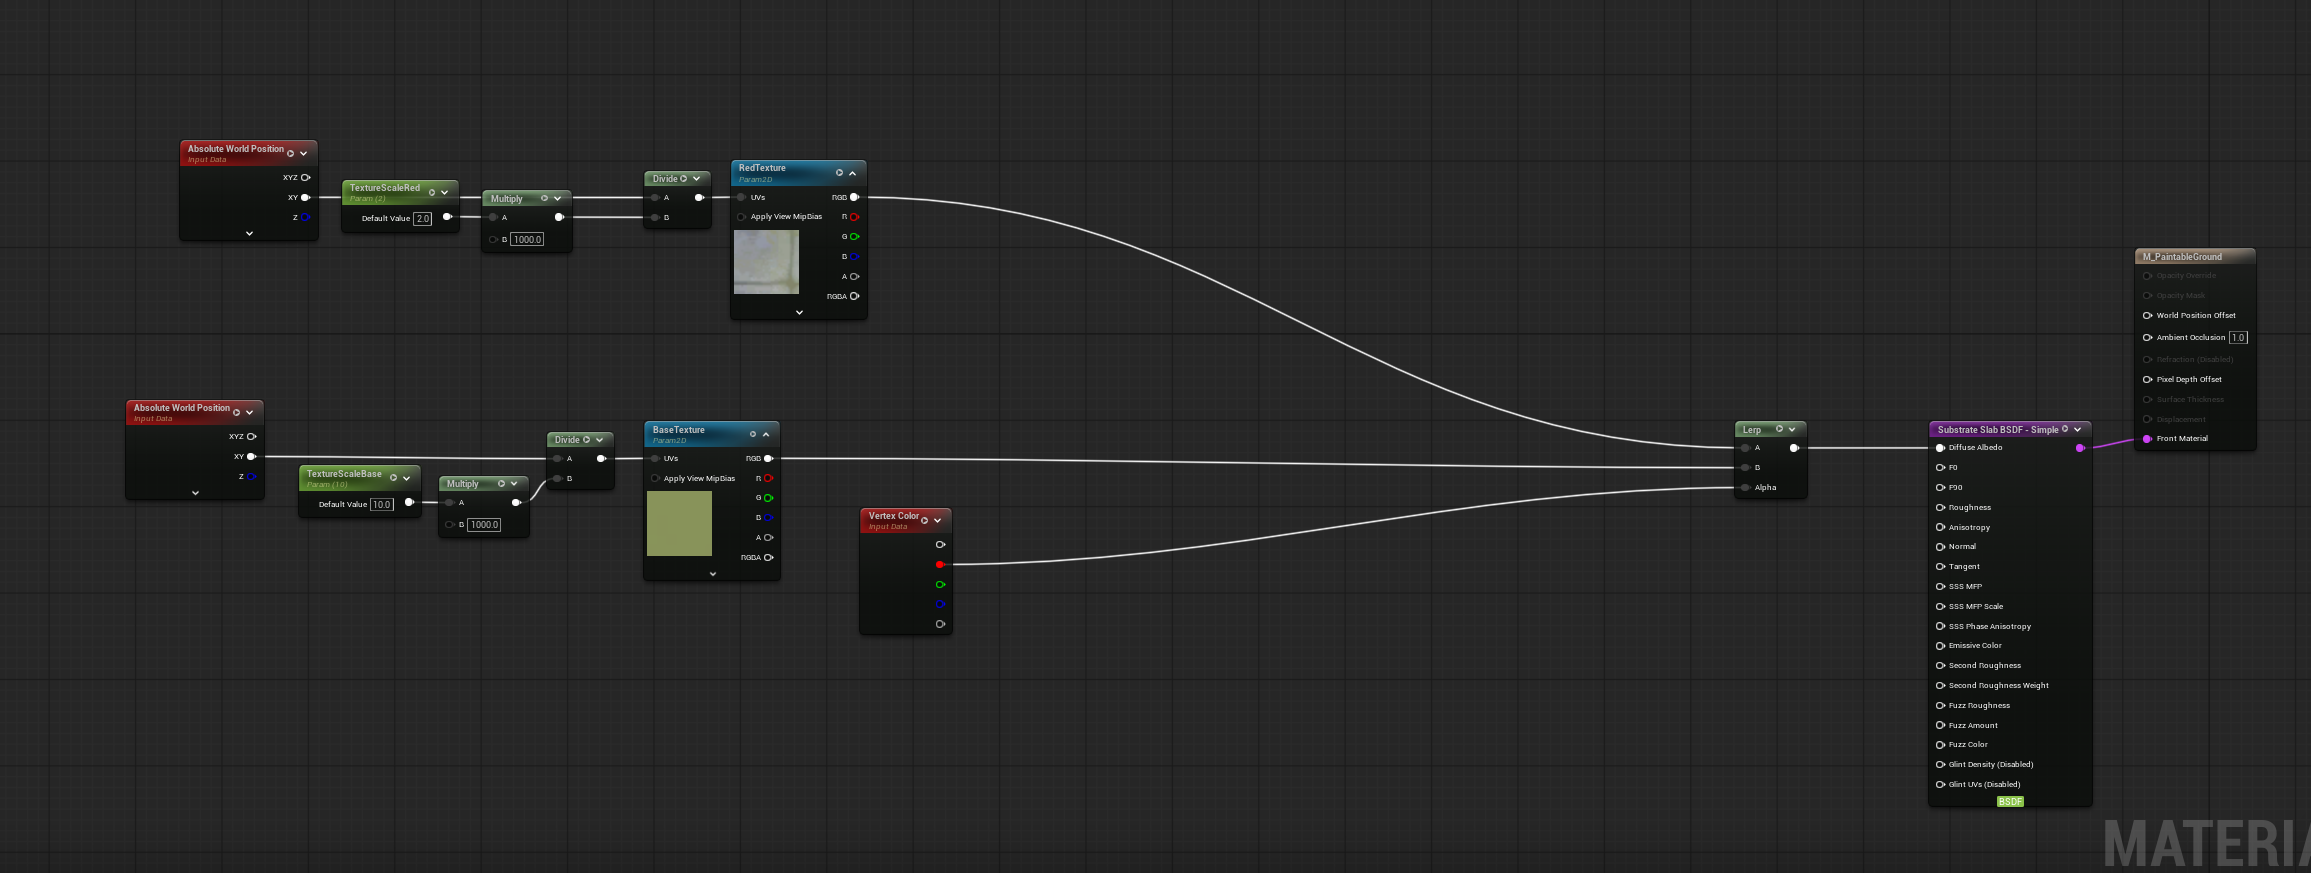
Super simple lerp based on red channel. I have some math that allows me to scale the textures in world space.
This looks okay, but I want a sharper falloff to give it a more stylized look.
Results were okay but I wanted a sharper falloff on the transition from grass to stone. By adding Cheap Contrast after getting the vertex color I was able to control how hard or soft the transition is. In this example 0 is a soft edge and 3 is a hard edge.
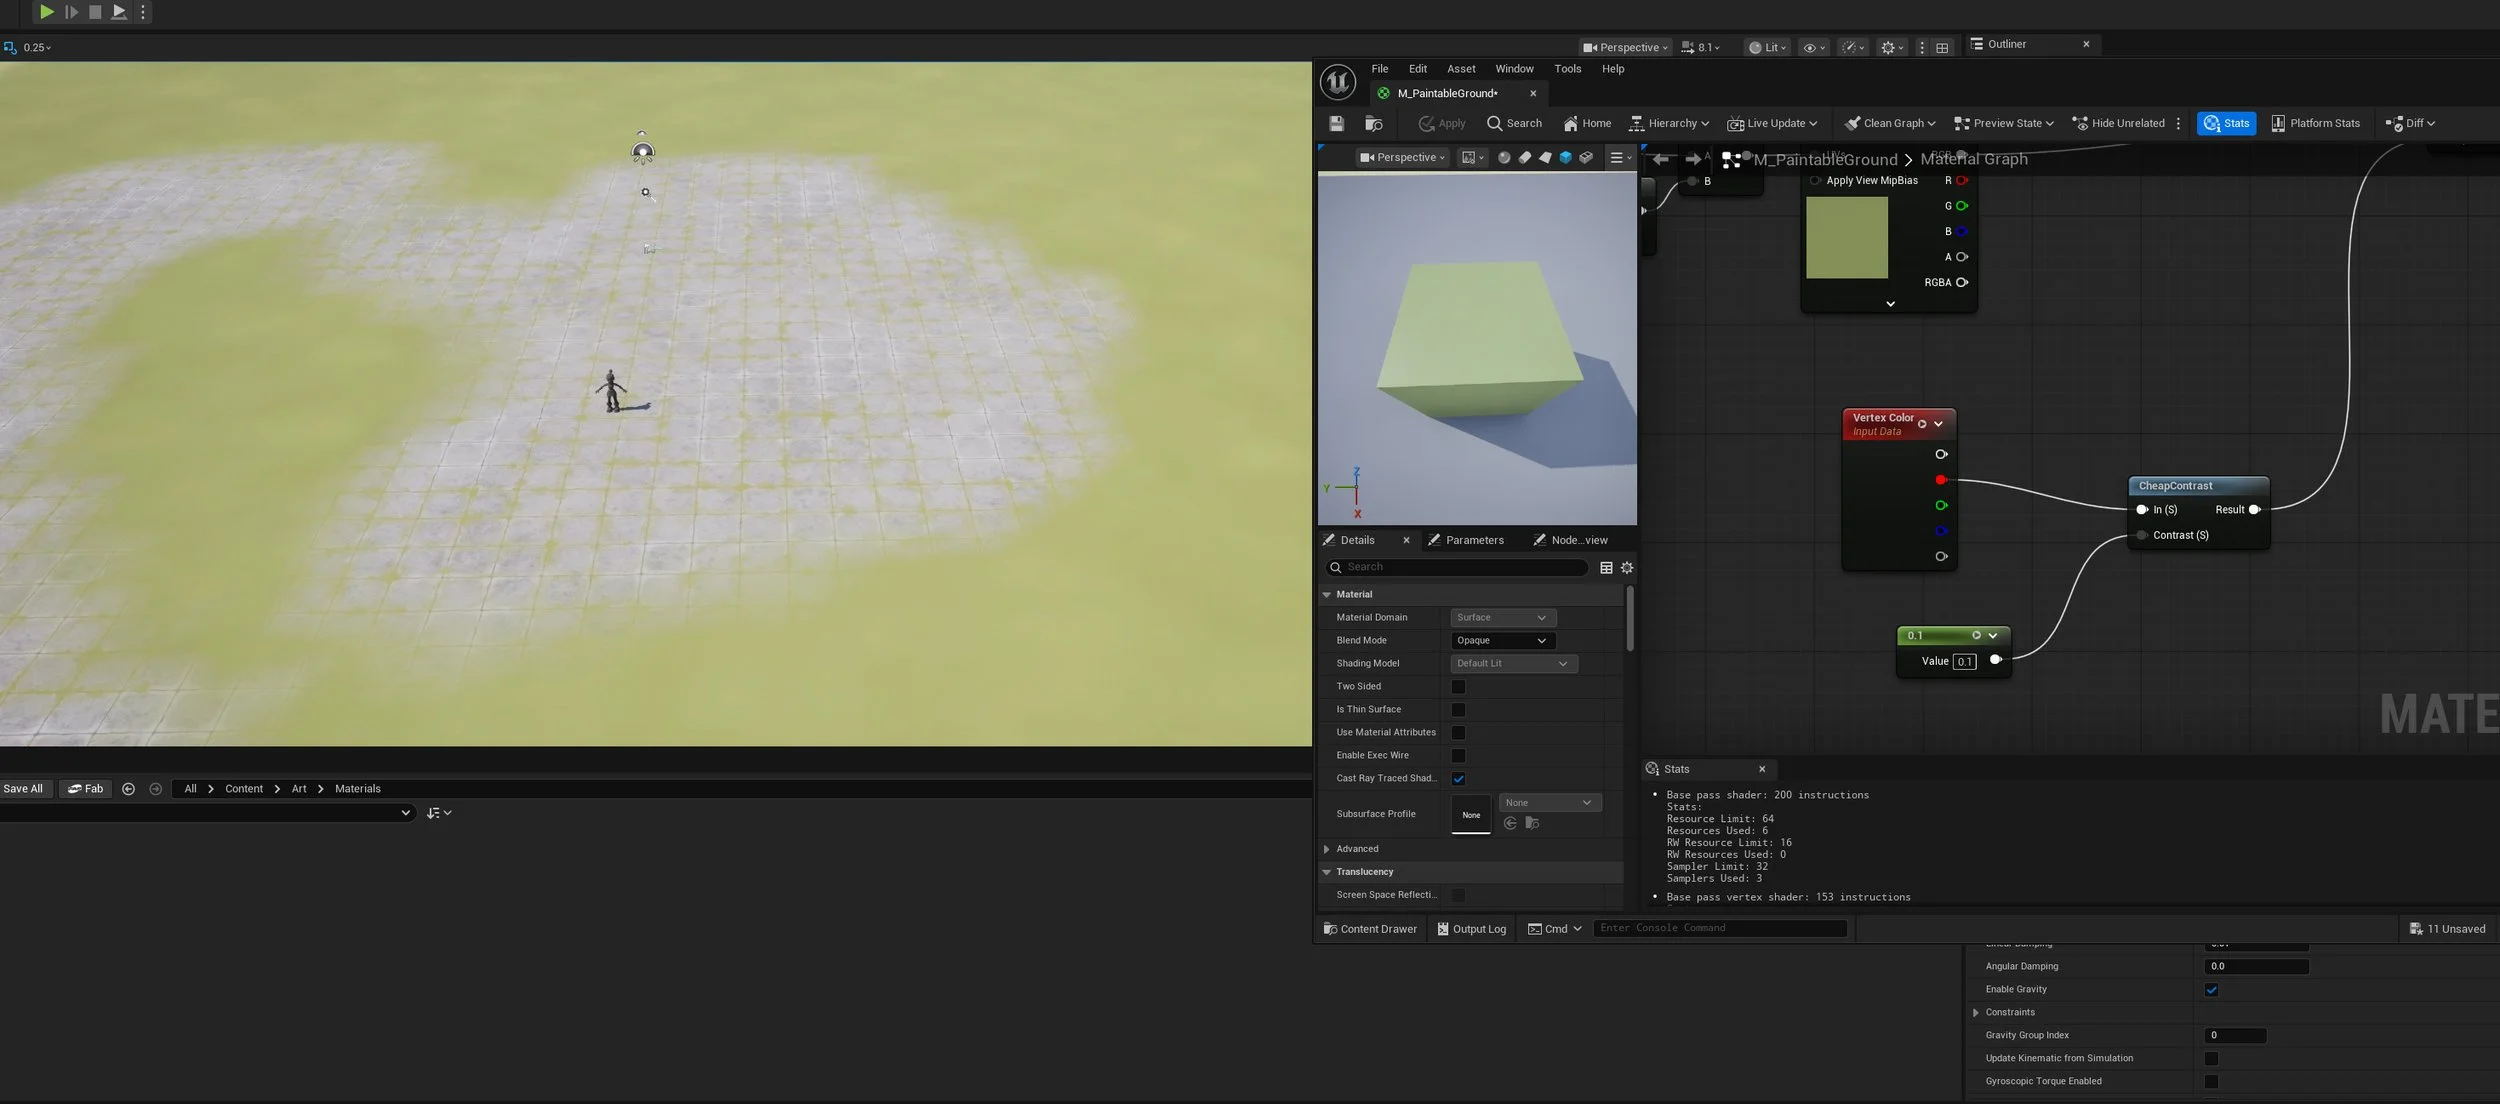
This is close to the same as without the Cheap Contrast node.
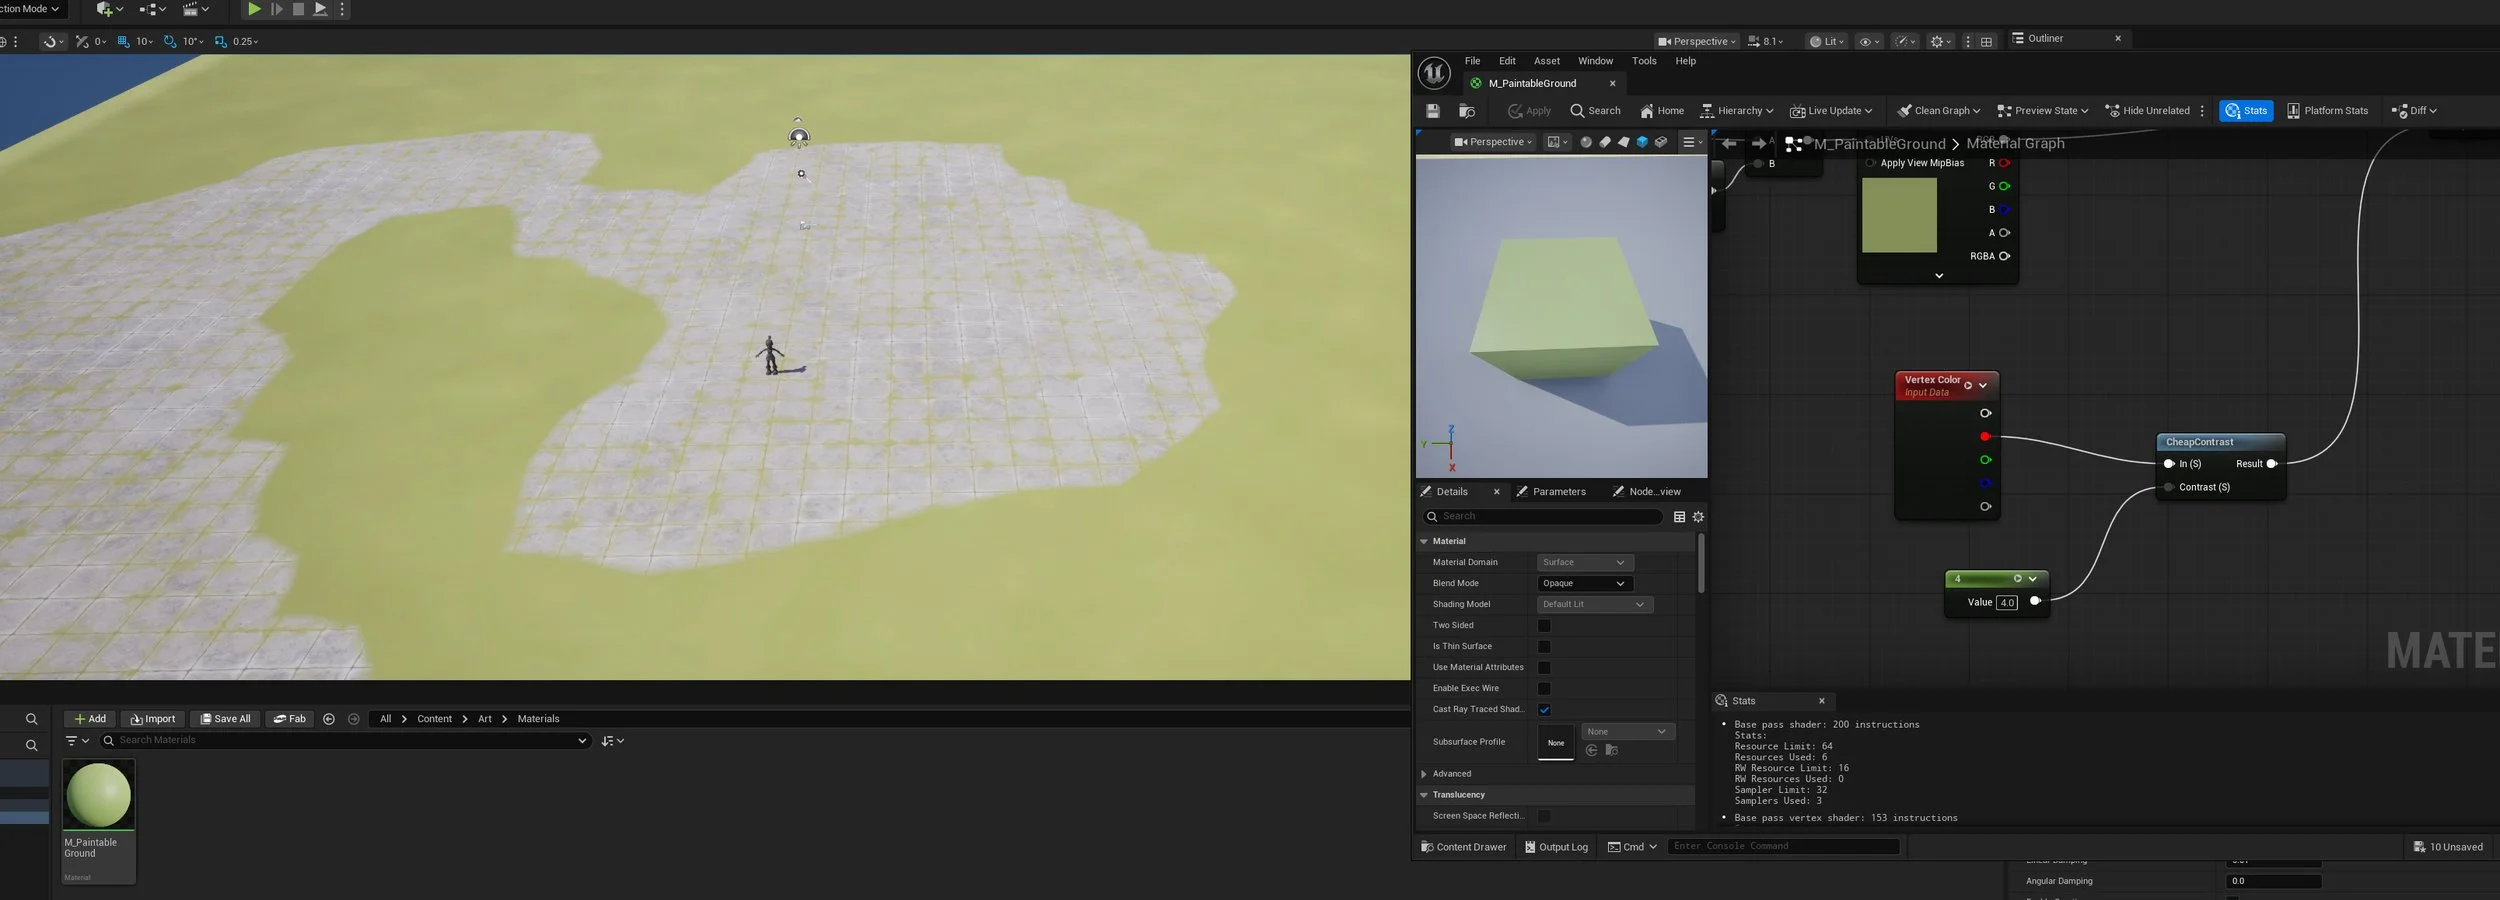
A higher value gives a sharper blend.
I don’t like how uniform the edge was, it doesn’t look natural. So I added a noise texture to the red vertex color. This broke up the edge and gave me control over how “organic” the transition looked.
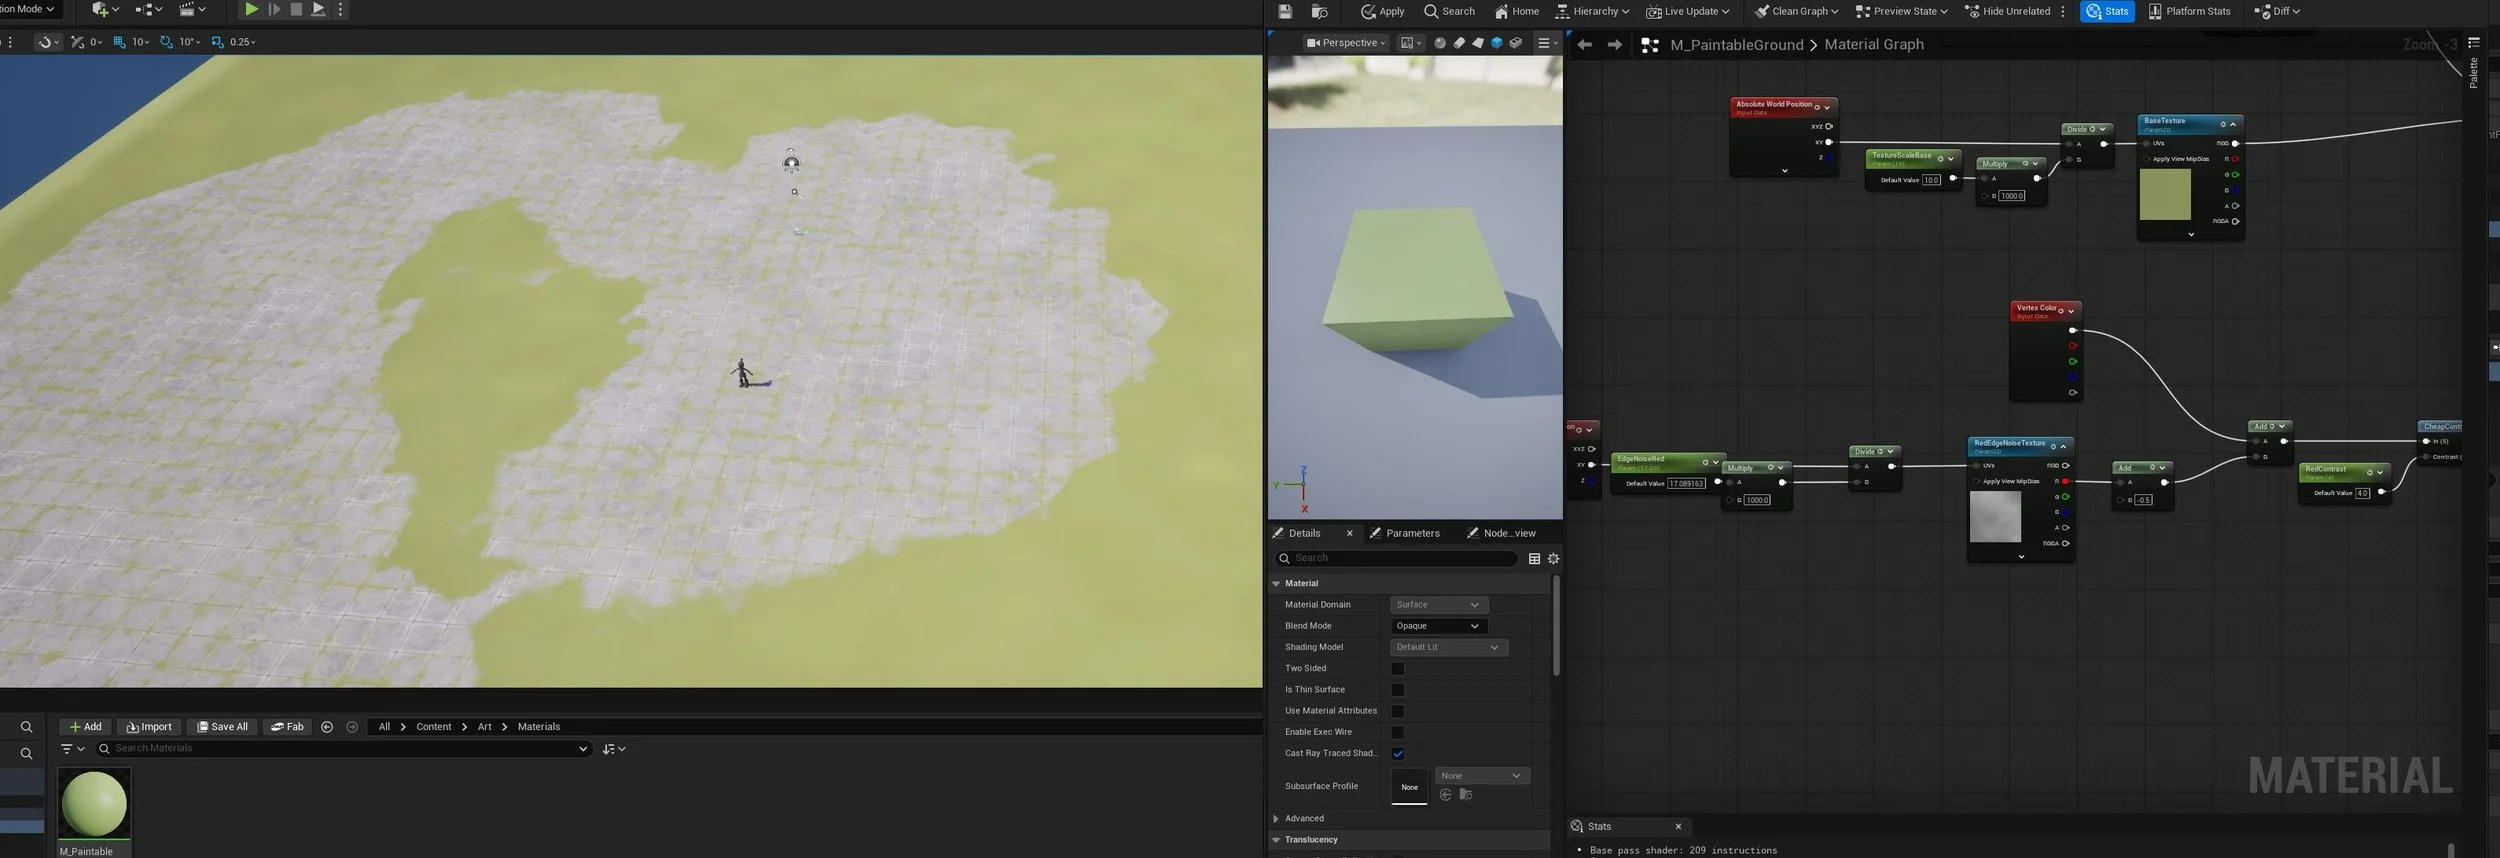
I like how this breaks up the straight lines.
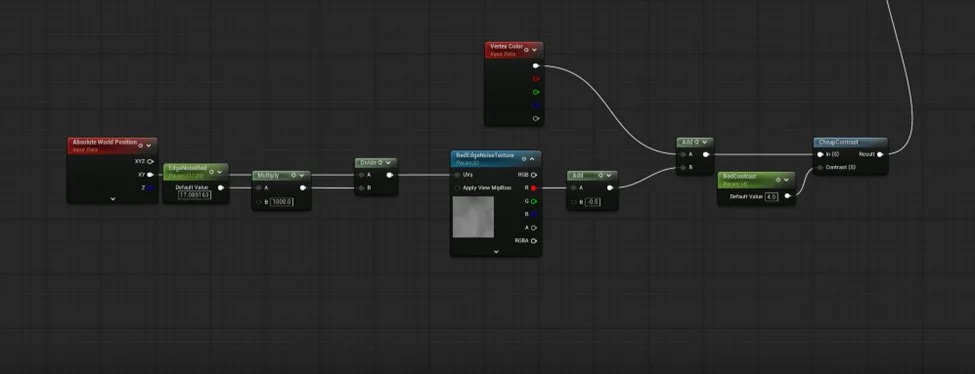
Here are the nodes, I just used a seamless cloud noise texture.
Looking at the screenshots from Death’s Door I like how they have a slight color change between the texture transitions. I achieved that by making a shadow width mask based on the red vertex channel color. Using this technique I’m able to darken the edges of the red vertex color areas. In the below screenshot I use it to simulate a drop shadow. This was an opportunity to clean up some of my parameters and add saturate nodes.
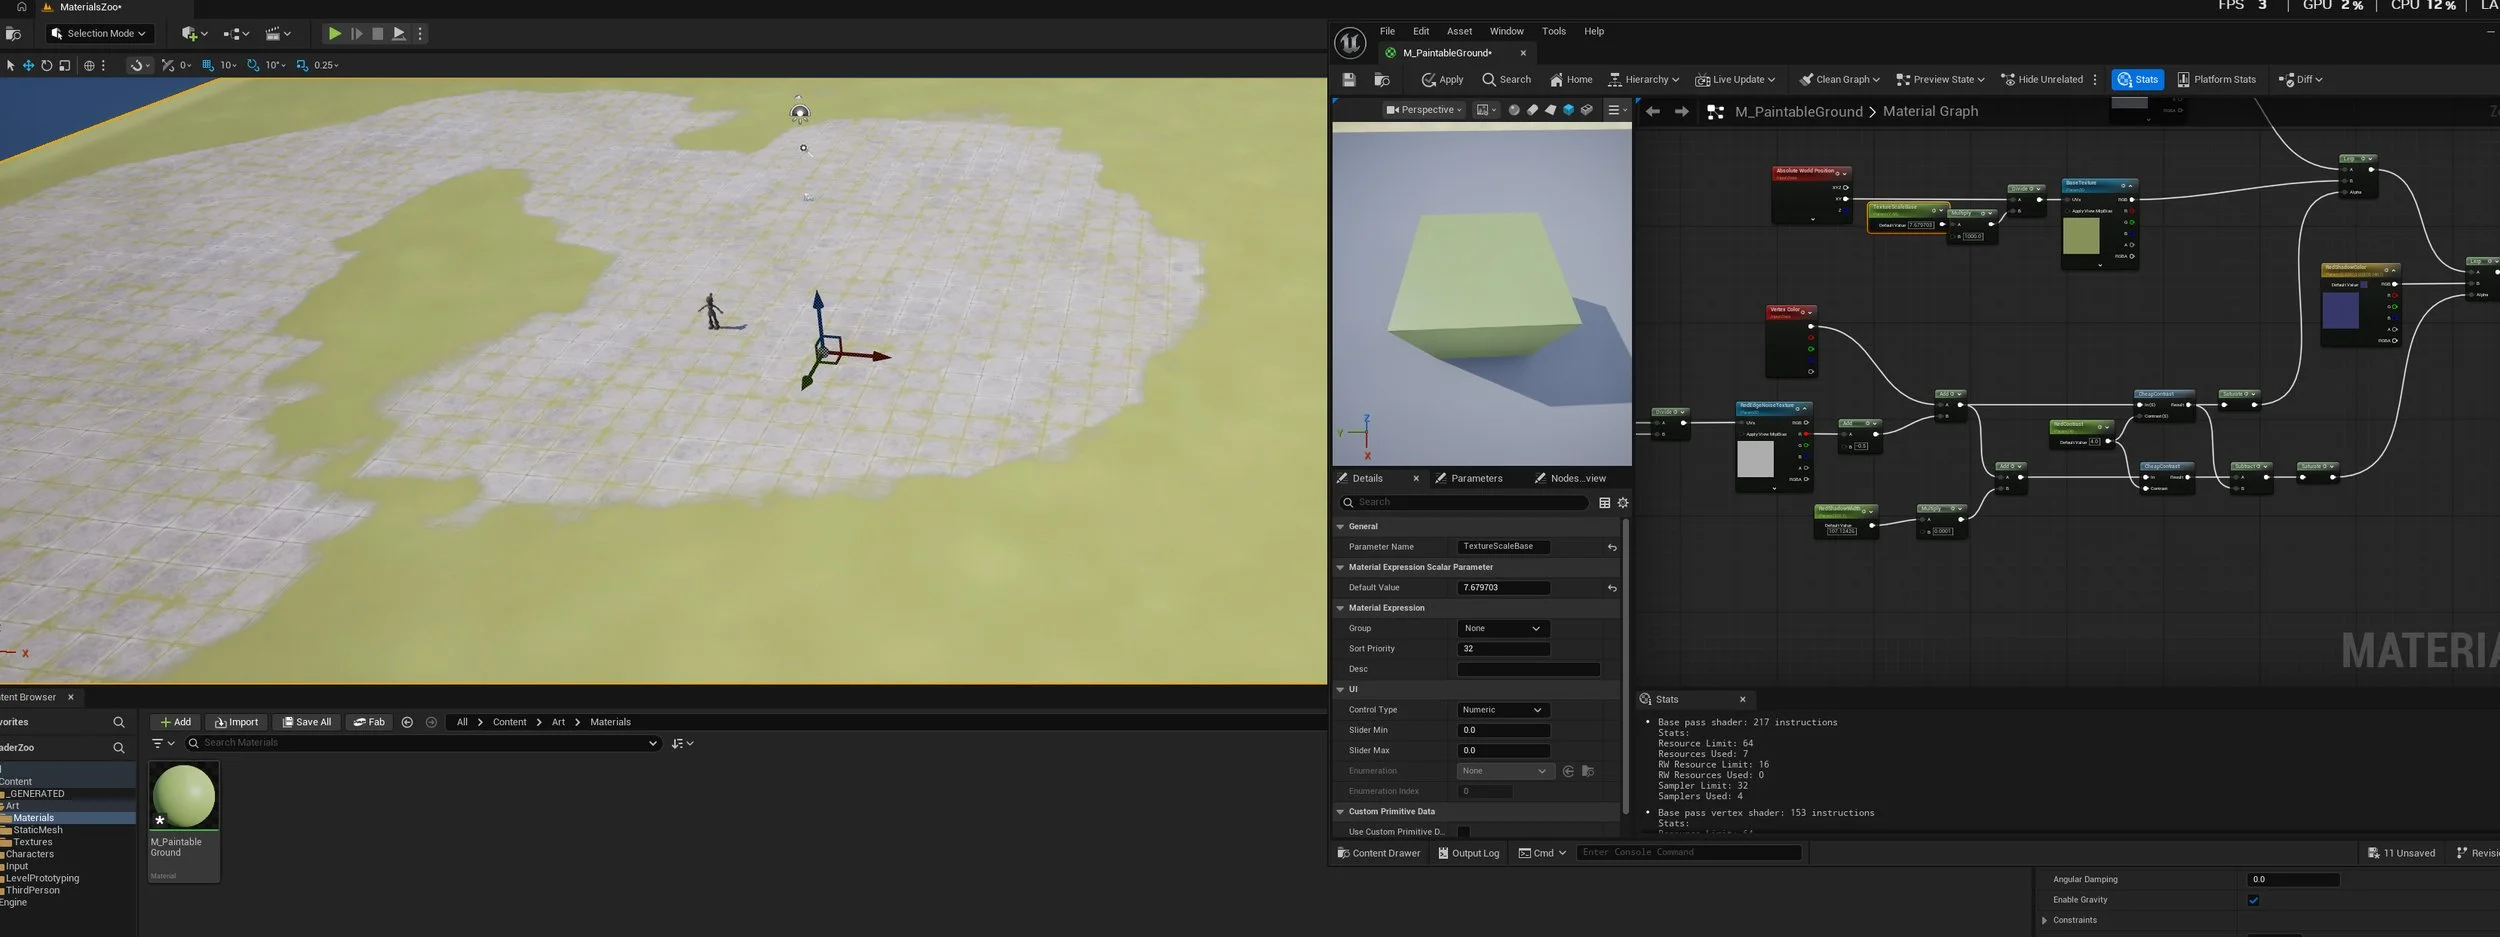
Slight shadow around the edges of the path.
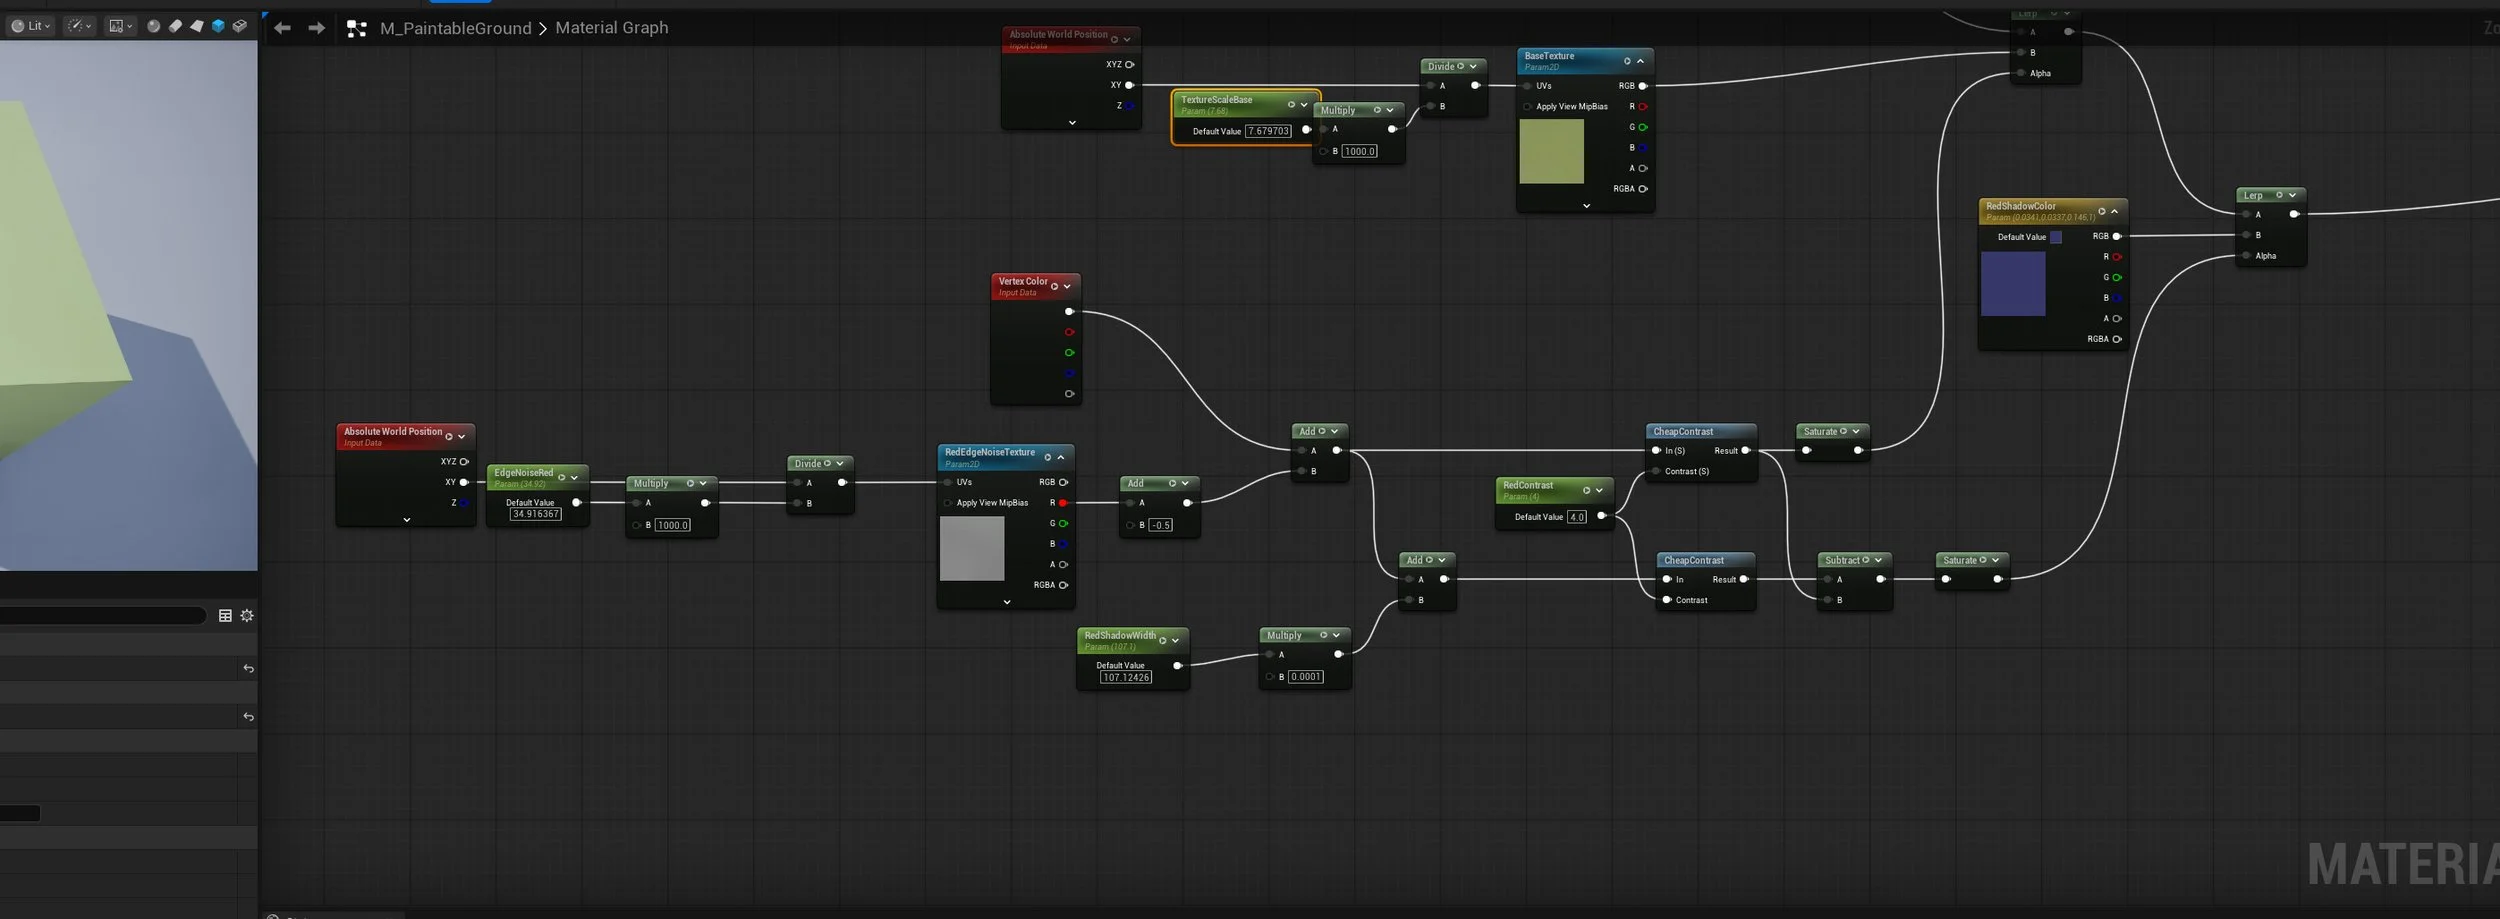
Here are the nodes with the shadow mask.
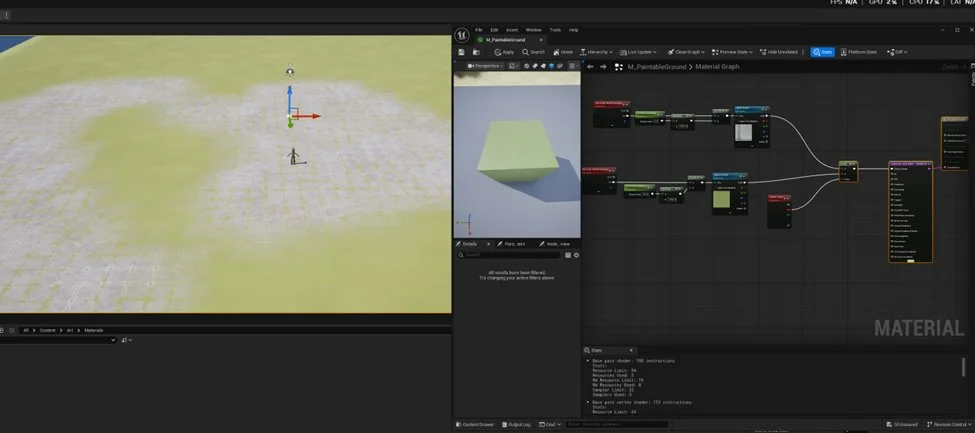
I wanted to try and optimize it a little more, so I moved the absolute world position to customized UVs. This way I was not have to call Absolute World Position a bunch of times. This saved me some instructions, but the cost is still a little heavier than I am happy with, especially for how relatively simple the effect is. I think the next iteration of this material will simplify the logic that transitions between textures. I can take my noise textures into Photoshop and contrast them manually. This will allow me to remove most of my cheap contrast nodes and it will save even more instructions.
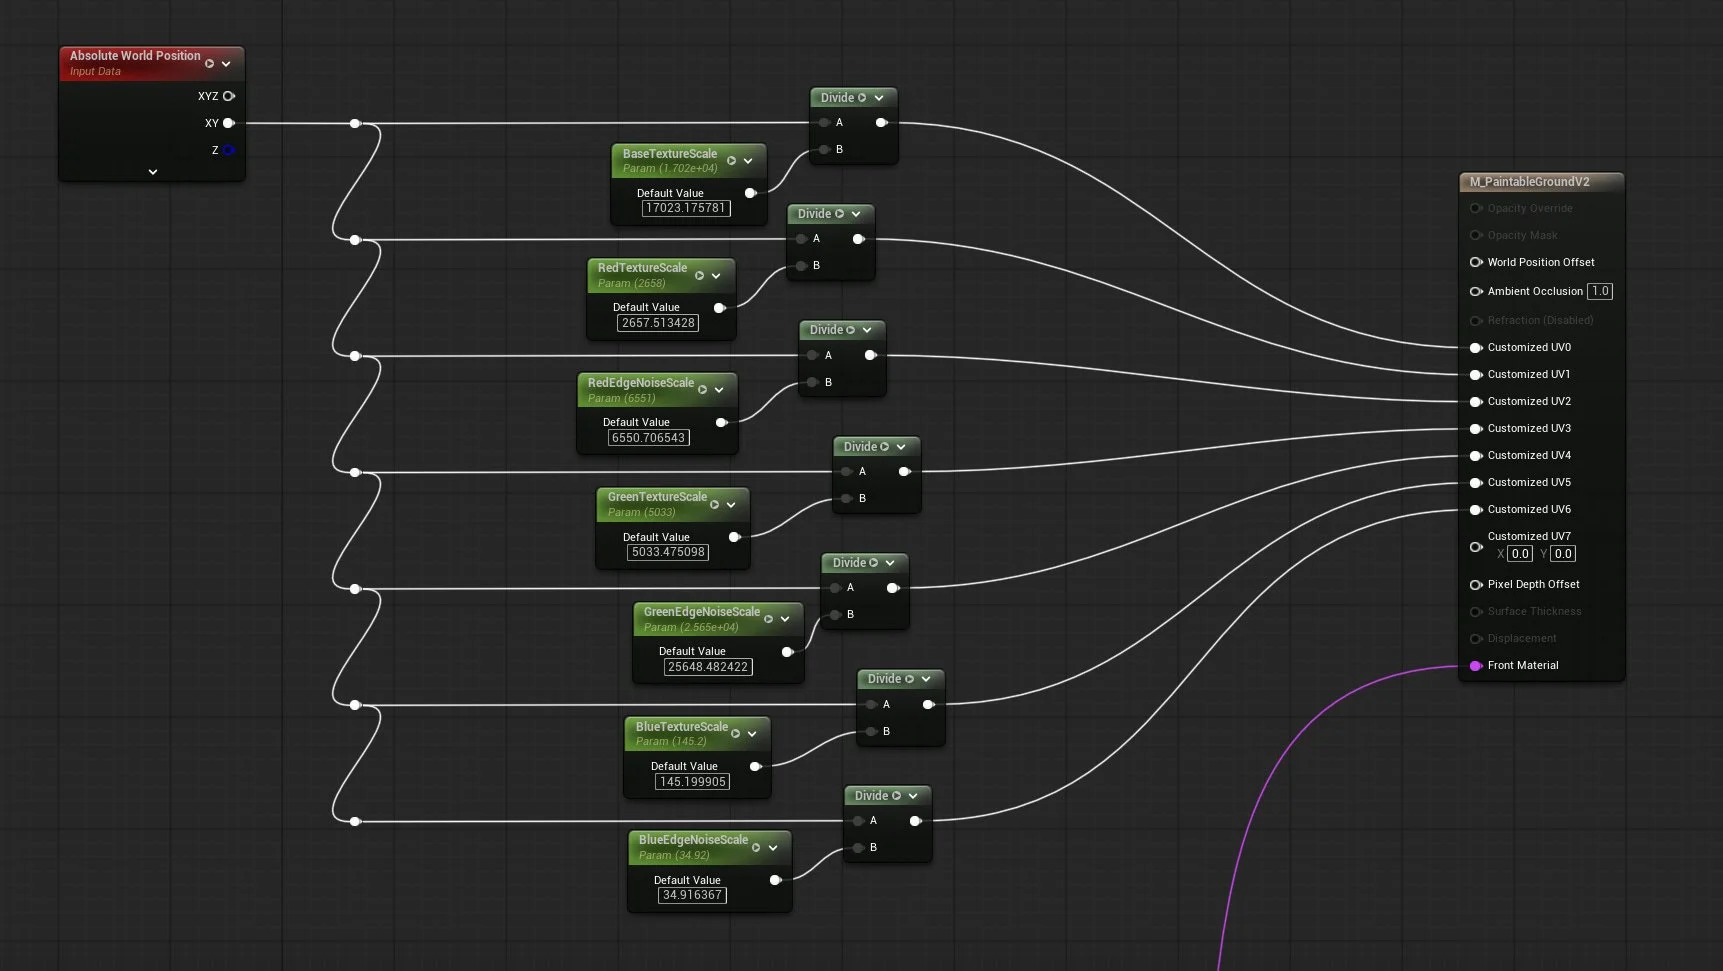
Customized UVs allow me to use one Absolute World Position call and give each texture a different scale.
After this, I went through and repeated the whole process for the green and blue channels. This was slightly tedious but mostly involved copying nodes and changing the names on parameters. The same setup was used to blend normals and detail maps. In this example, I’m not using normal maps, so I gave it a blank map as the texture input. I’m using different roughness maps, and the material is set up to accept detail maps as well.
My last step was to organize and set up groups, so the material instance was easier to work with. It looks like a lot of options, but once it is organized, it’s not too bad. I was actually worried that it would be more complicated.
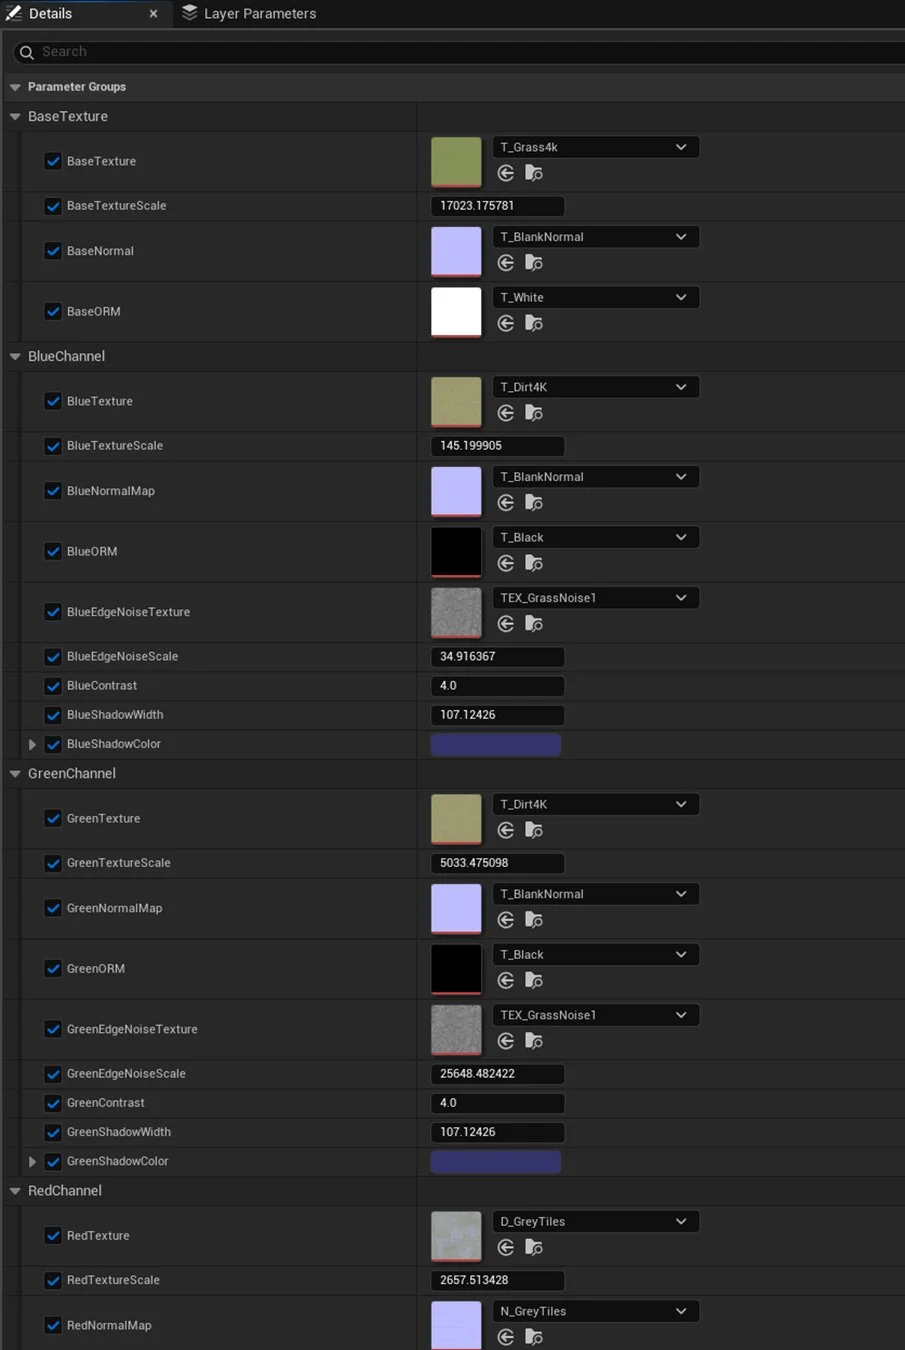
Material Instance
Here is a video of the material being painted on. It turned out to be really fun to paint directly in Unreal!
Next Steps
The biggest opportunity for this shader is how it handles slopes and vertical surfaces. Everything is an XY world position, by using the material on anything that is not flat, the textures will stretch and distort. It looks like Death’s Door hid this by putting geometry like rocks around the edges of the ground. I could also handle this by using triplanar mapping and then having Unreal bake the textures on the mesh. At that point, I’d rather just unwrap my environment and make sure my UVs tile properly with a consistent texel density. Moving it to UV space will also make it much more performant.
The art leaves much to be desired. By adding additional meshes to the ground to help the world look less flat. My focus was on getting the material to function properly and will fix up the textures when I am in a 2D mood.
Overall, I came pretty close to replicating the techniques that Tunic and Death’s Door seem to use in their materials. Both those games also do cool post process effects and film grain to bring the different textures together. My next step will be to clean up the textures themselves, and putting an extremely low opacity color Perlin noise over all the textures to help make it look more interesting. Also some kind of cloud effect over it all like in Death’s Door would be cool. Having cloud shadows move across the ground will add a lot of life to the environment. If and when I make a second iteration of this material, I want to use height maps to blend the textures together even better. By going ahead with height maps, I would use HeightLerp or Pixel Depth Offset to make the different textures look more polished.
This was a super fun project, and it turned out really well! I’m not sure what my next project is; I’m thinking about doing something with runtime grass because that seems like a cool challenge. Also, I’ve been interested in seeing what can be done with the depth buffer so, I might make some water or an outline post process.