Stylized Water Shader in Unreal 5
A stylized water shader is something I’ve been interested in making for a while now. As with all my art, the first step was to find visual references. Mario Kart: Double Dash, Windwaker, Tunic, and Palia all have interesting water, so I filled up a PureRef file with screenshots. Whenever I try to make a complicated project, I break it down into smaller pieces to allow me to focus on individual steps. The steps for this water material included: depth fade to make the water look deeper or shallow, edge detection for coastal foam, waves that tie into a normal map to simulate ripples, opacity/refraction for underwater visuals, and a layer of stylized caustics to give the water a magical look.
The first step involved setting up a simple depth fade by linearly interpolating (lerping) between a deep, dark blue and a lighter blue based on its value in the depth buffer. This step is straightforward by demonstrates the powerful effects achievable with the depth buffer.
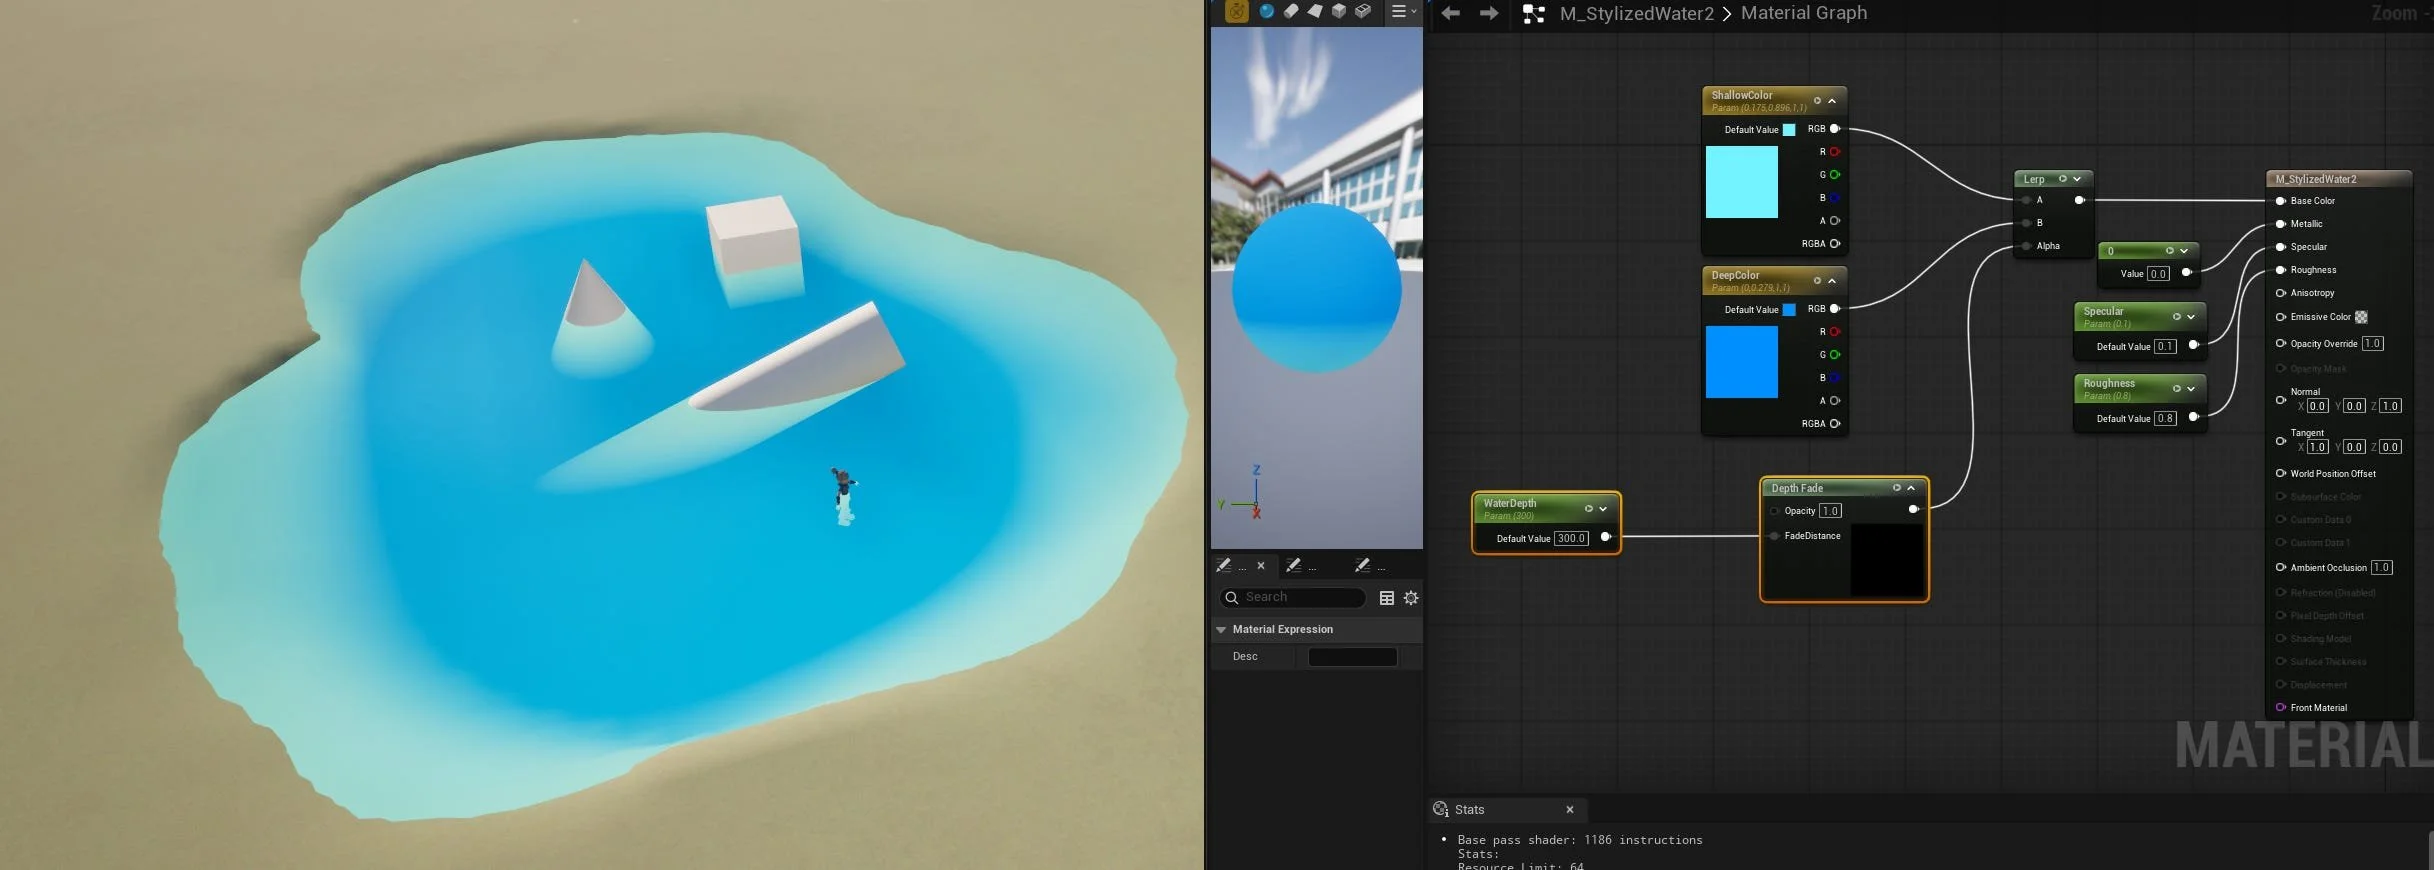
Here is the water with just the depth buffer.
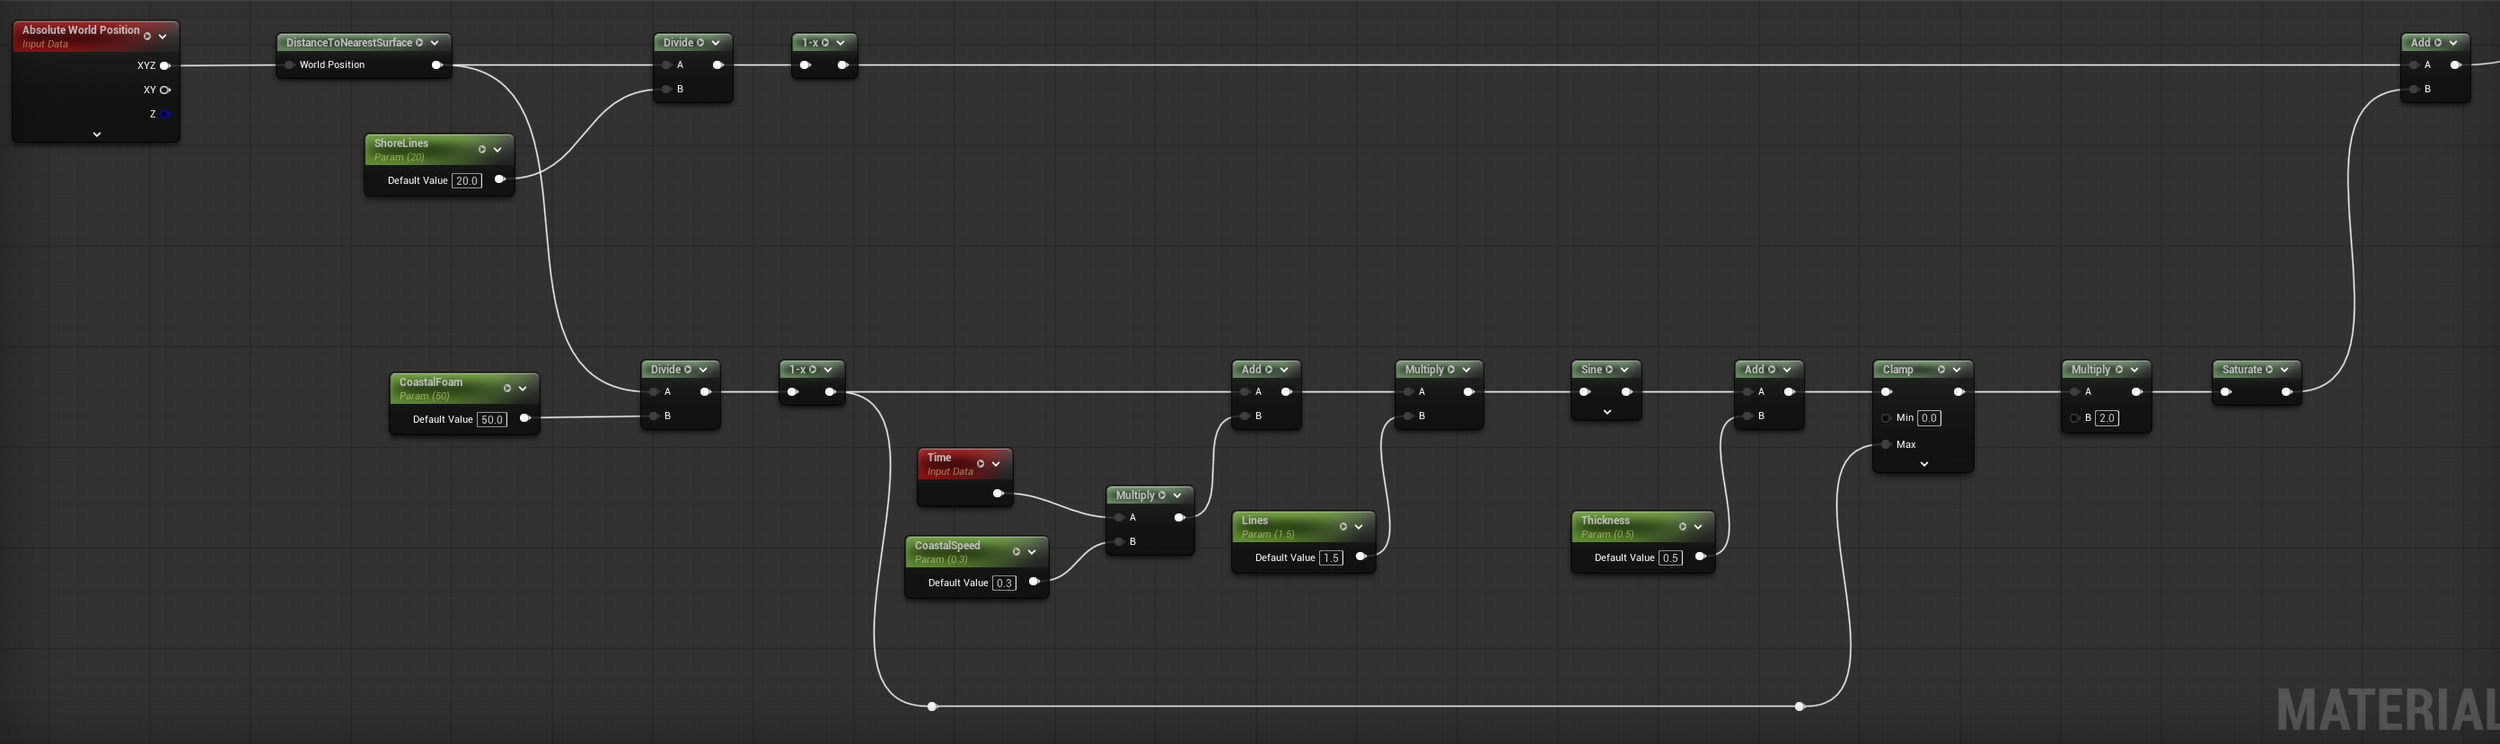
Next, I wanted to set up animated foam around the shoreline of the water. World aligned UVs and DistanceToNearestSurface were used to determine the proximity of each pixel to the shore. The ShoreLines parameter affects how far off the shore the foam coloring begins, while CoastalFoam affects the width of the ripple lines. The ripples line around the edges are animated with a sine wave to provide a more natural feel. CoastalSpeed controls the velocity of the ripples, ShoreLines affects the frequency, and CoastRippleThickness determines the thickness of the individual lines.
Not liking how uniform the lines were, I added a layer of noise to it. A texture sample with two different scales was used. Each separate scale has its own Panner node to move it at different speeds. This made interesting shapes form in the ripple lines. At this point I adjusted some of the parameters and color values to make it look more interesting.
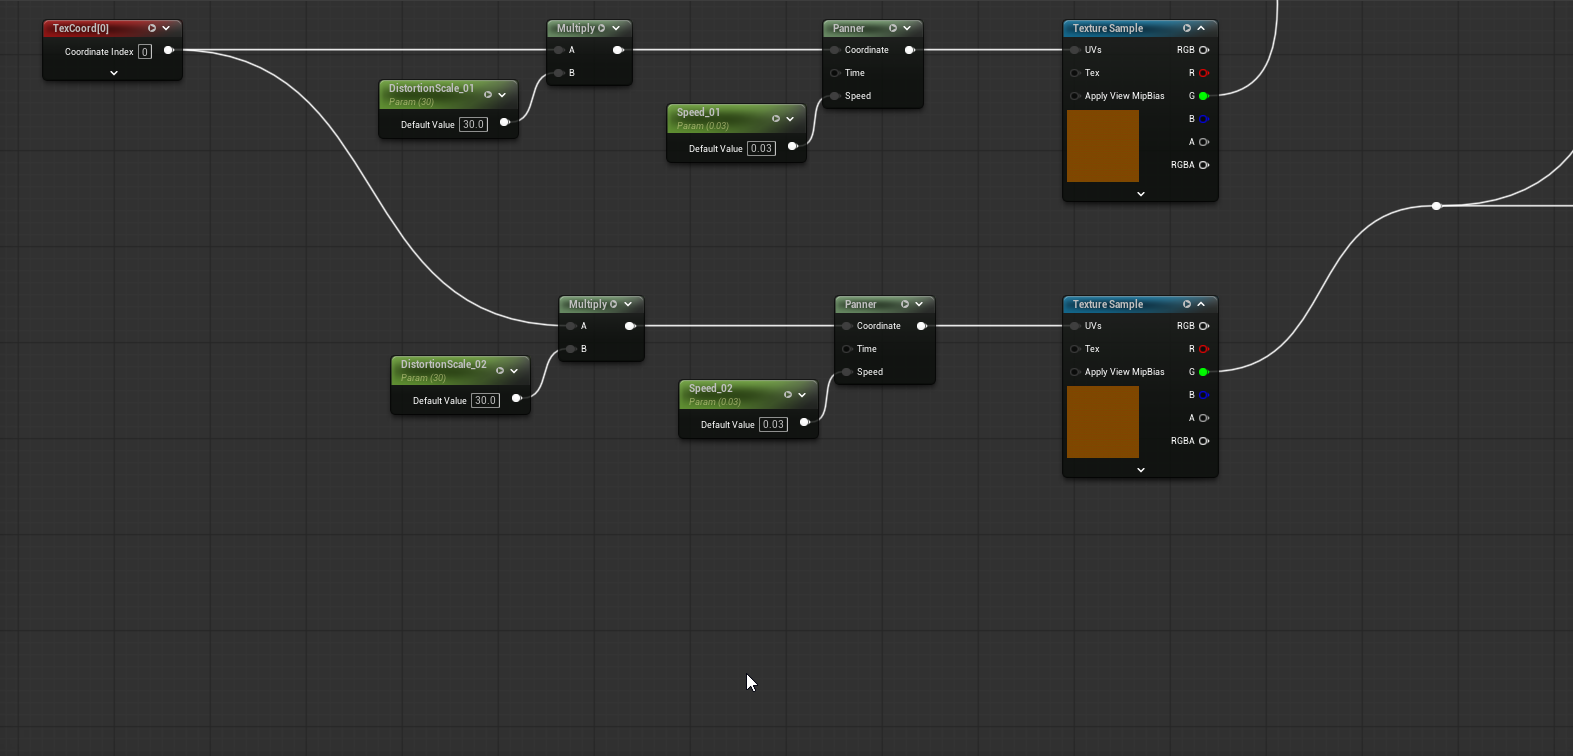
This is the setup for the noise
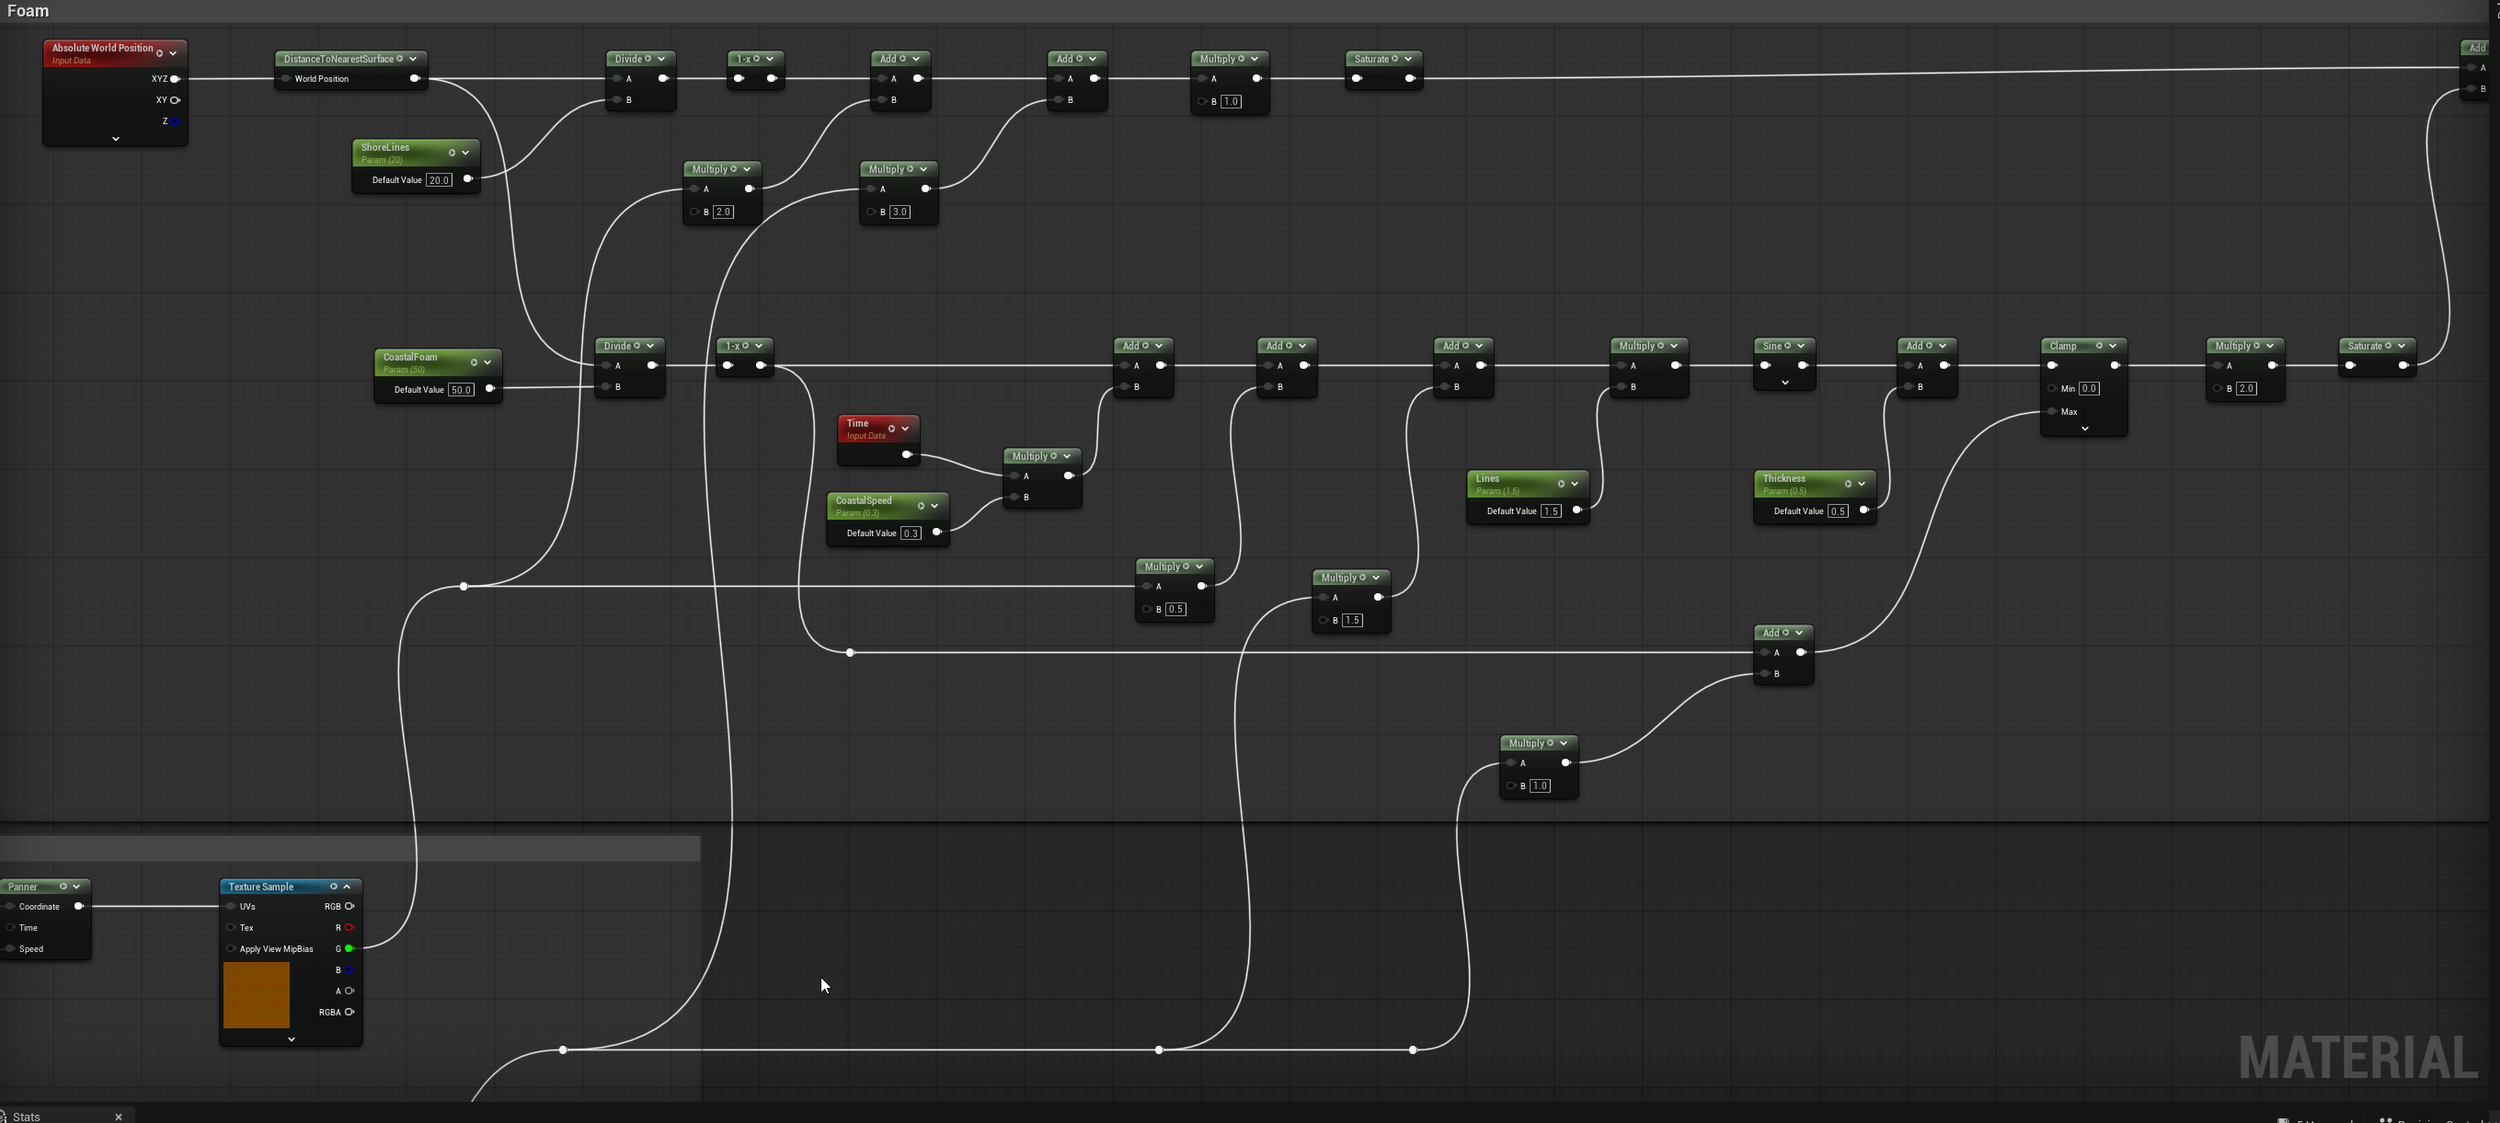
The above texture nodes are plugged into the foam set up to break up the lines.
The water still seemed flat, so it occurred to me that something needed to be done with the normals. By using a similar Panner logic, the normals were animated to move across the surface. At first the normals were too harsh, so I set up a Lerp between the actual normal map and a neutral all blue “normal” map. This way a parameter could be used to control the intensity of the surface normals. In the video below I cranked up the intensity, so it is visible even with the compression of the video.
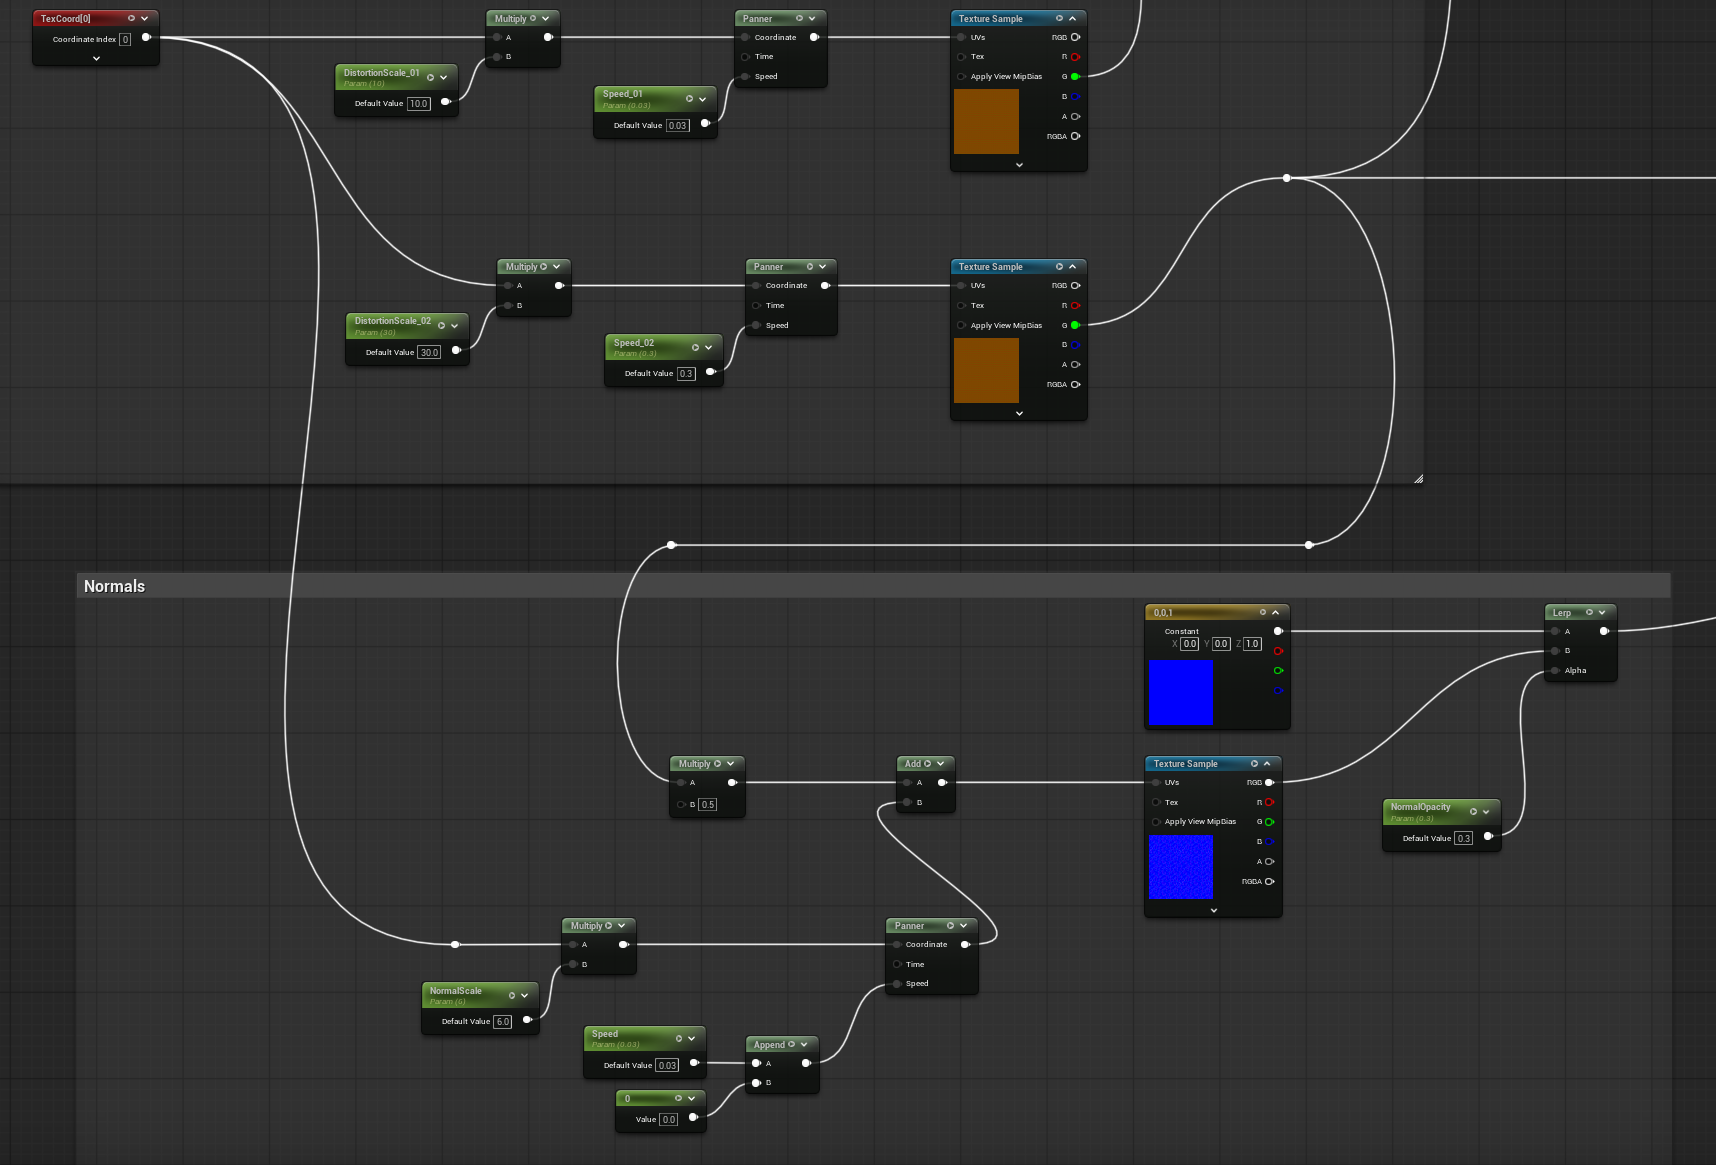
This is how I set up the normals.
Now that the normals were working, I wanted to set up opacity and refraction. I wanted to tie opacity and refraction into the above normal map to give the water more life. This is my opacity setup, OpacityMin and OpacityMax affect how “murky” the water is, and FadeDistance affects how deep into the pond is visible. The refraction setup is simple; just a Fresnel to add a little bit of highlight to the distortion from the normals.
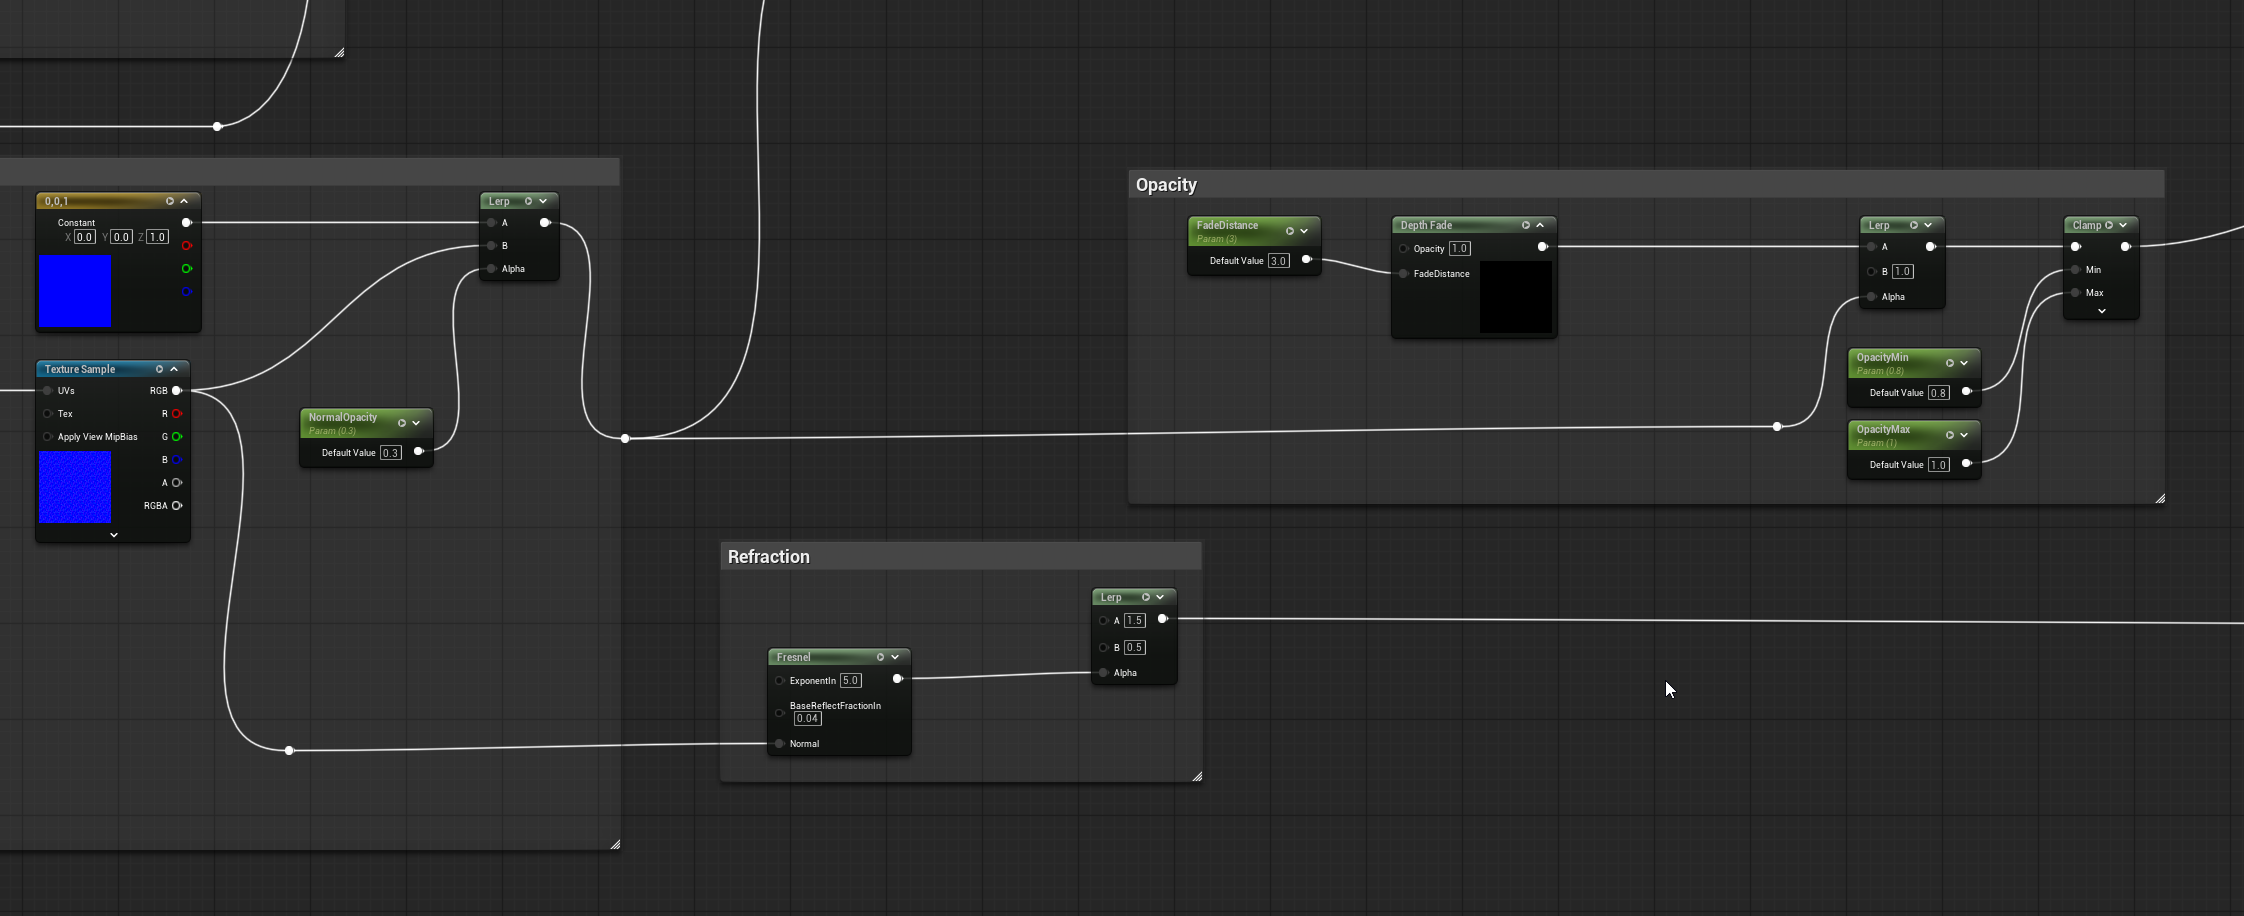
Opacity and refraction setup.

This is the shader before refraction is added.
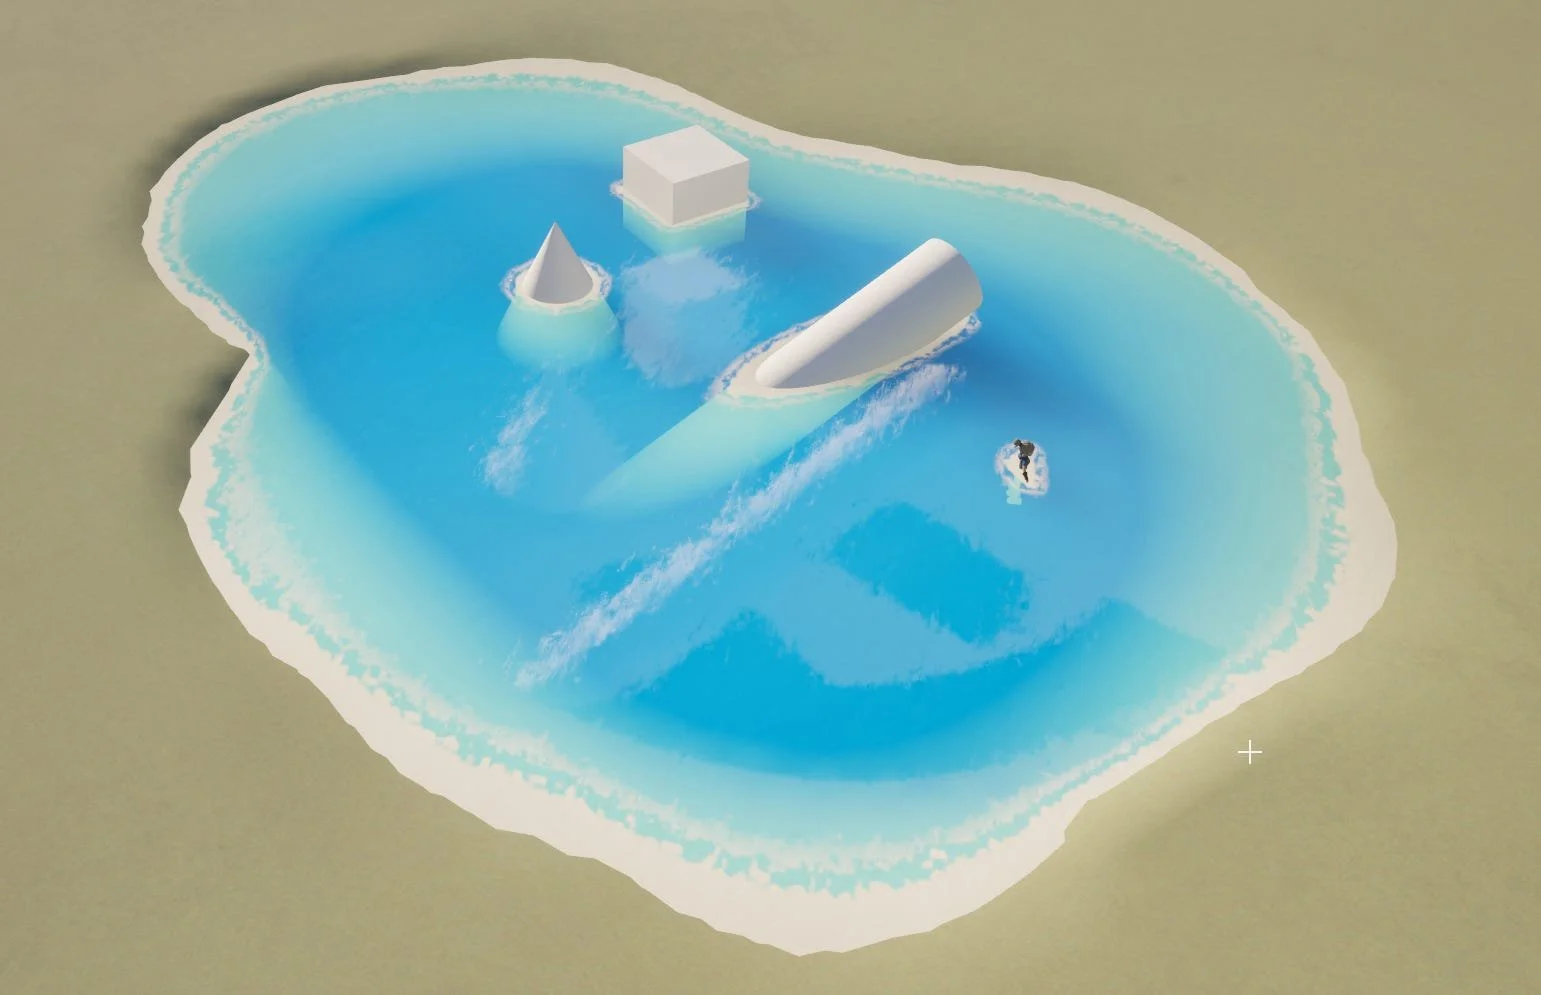
And this is the shader with refraction; I made the effect stronger to see how it is working.
Finally, caustics were added to provide surface variety. The caustics are entirely emissive, allowing them to stand out against the water. They were also tied into the normal map with a FlattenedNormal node. This helps to add a little more variation in the texture. Parameters are used to control the pan speed of the caustics. Originally, I tried to be clever and hook it up to a Vector3. My thought was that by controlling the green and red channels will be easier than having two separate parameters. This was tedious because I had to adjust the numbers by super small increments. In the end I decided to split it into two separate parameters with a multiply node.
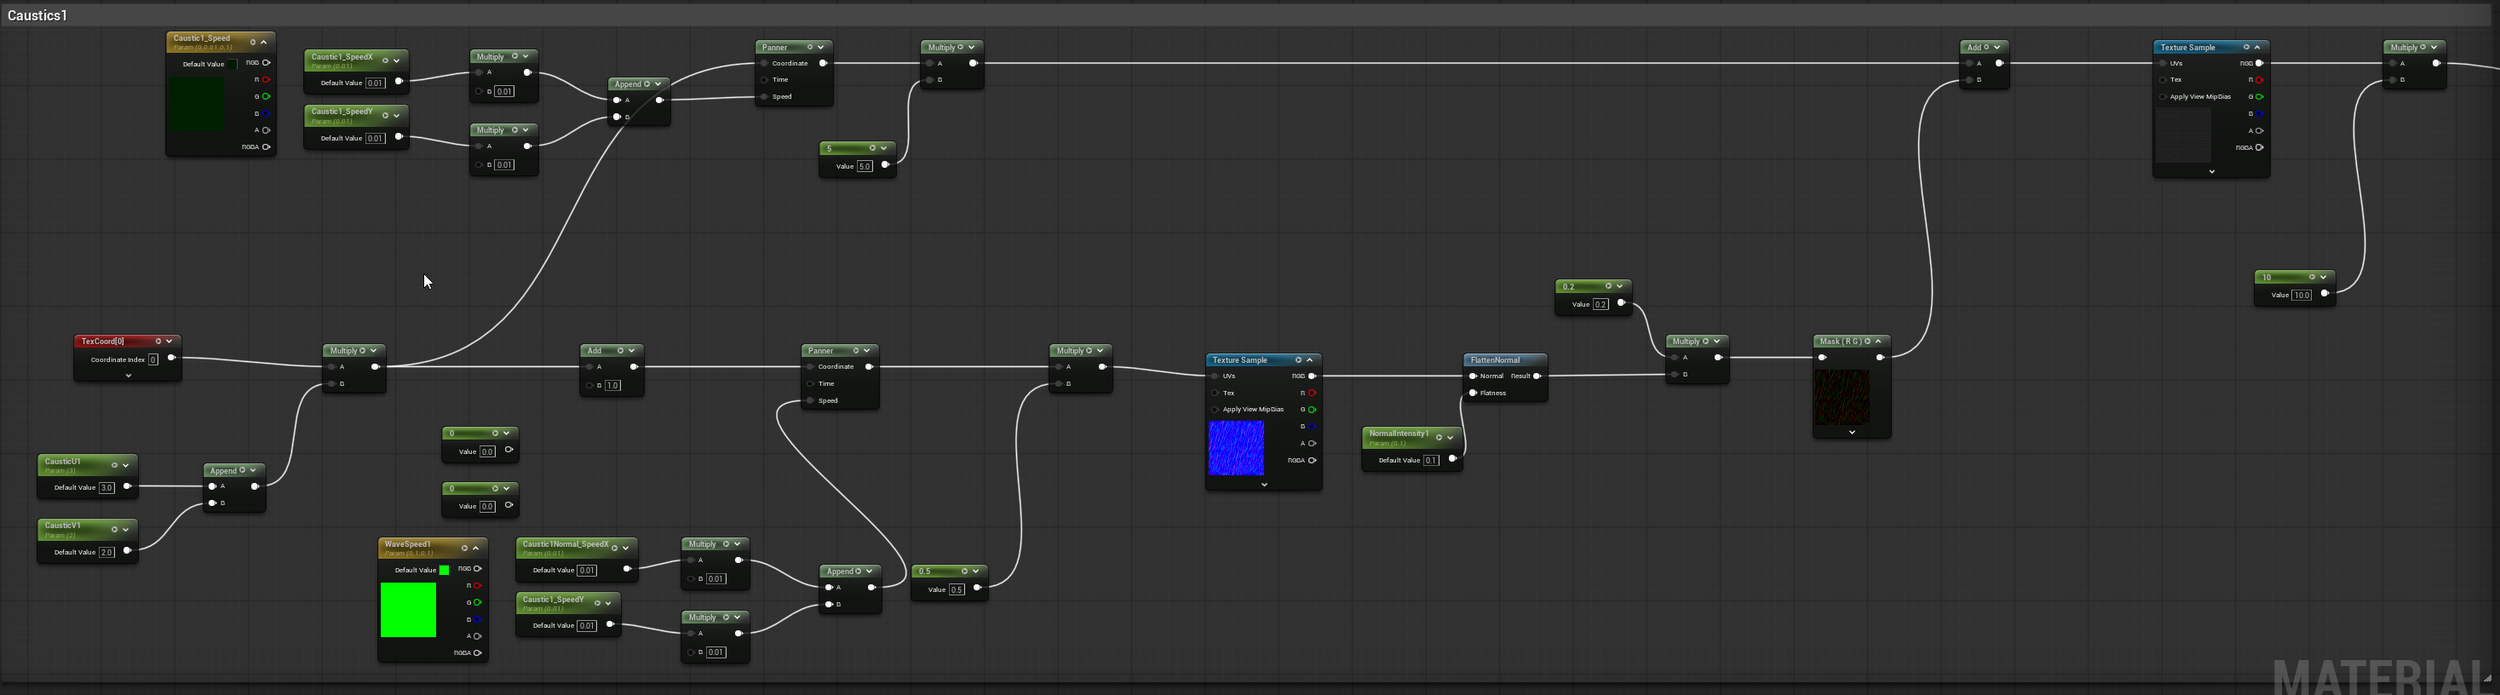
I used the same caustic set up for both layers, just changed the parameters.
To hide the obvious tiling of the texture, a second caustic layer was created to run over the first. The caustic emissive outputs were tied together, and a control was added to set the intensity of the effect.
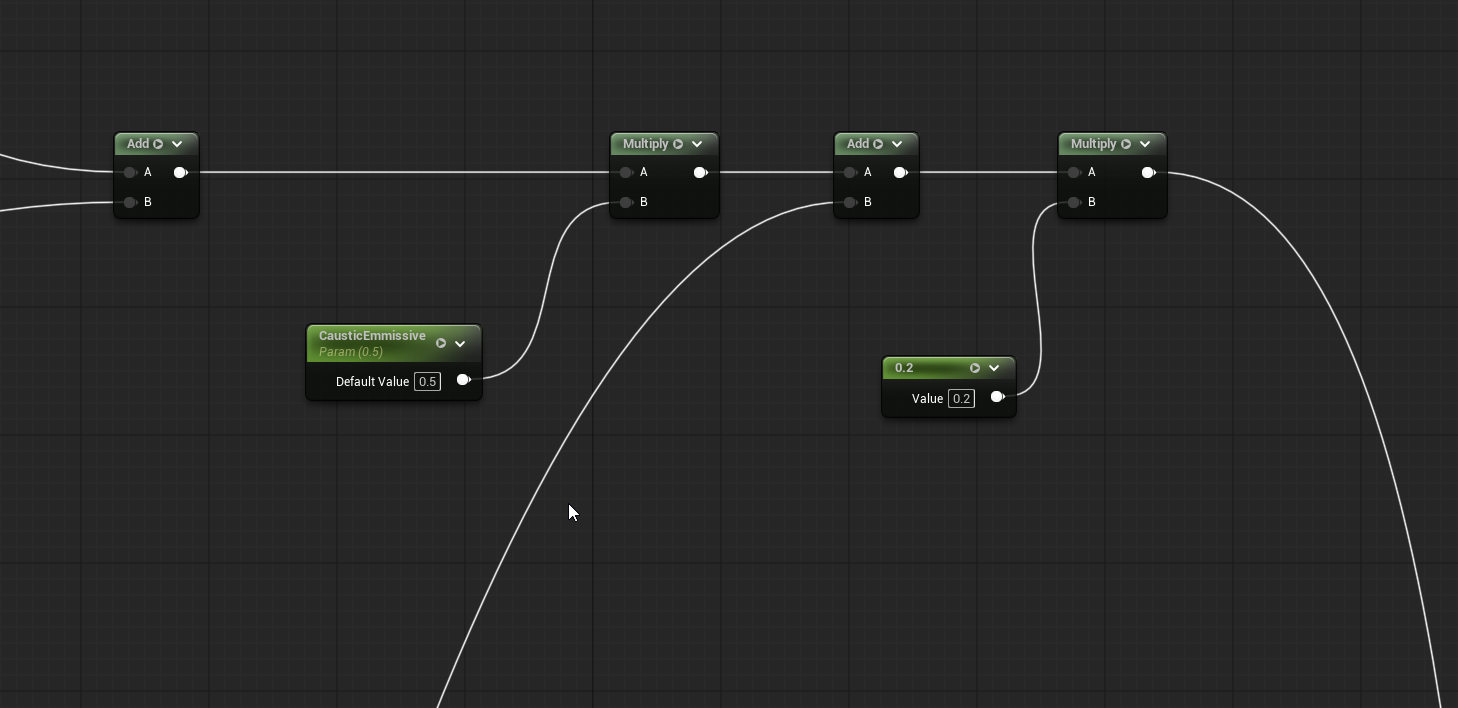
These are the nodes that combine the two caustic setups.
As always, the final step involved setting up a parameter groups and organizing the graph so the material could be easily utilized by others.

So many parameters!
Below is the finished effect. I put a scene together with some assets I made for previous projects. I’m not an environment artist, but I like how it turned out. I softened the colors of the world lights and made them more purple/blue. This was a fun process, and I really enjoyed how adding the movement to the texture made it feel “alive.” DepthFade is amazing, and I’m already thinking about other ways to use it, like force fields or even tying it into a dithered alpha mask to simulate fog or glass.