Spline Tool in Unreal 5
Late last year, some friend and I decided to make a party game. We envisioned players controlling a group of raccoons who break into a house and steal furniture. We implemented furniture movement through physics controllers, requiring players to work together to manage larger objects like couches or beds. Since I was comfortable working in 3D, I created all the assets as well as supported the rest of the team. This project was really enjoyable because I developed my first environmental mod kit for the houses and environments. It was rewarding building pieces for my friends to design levels with.
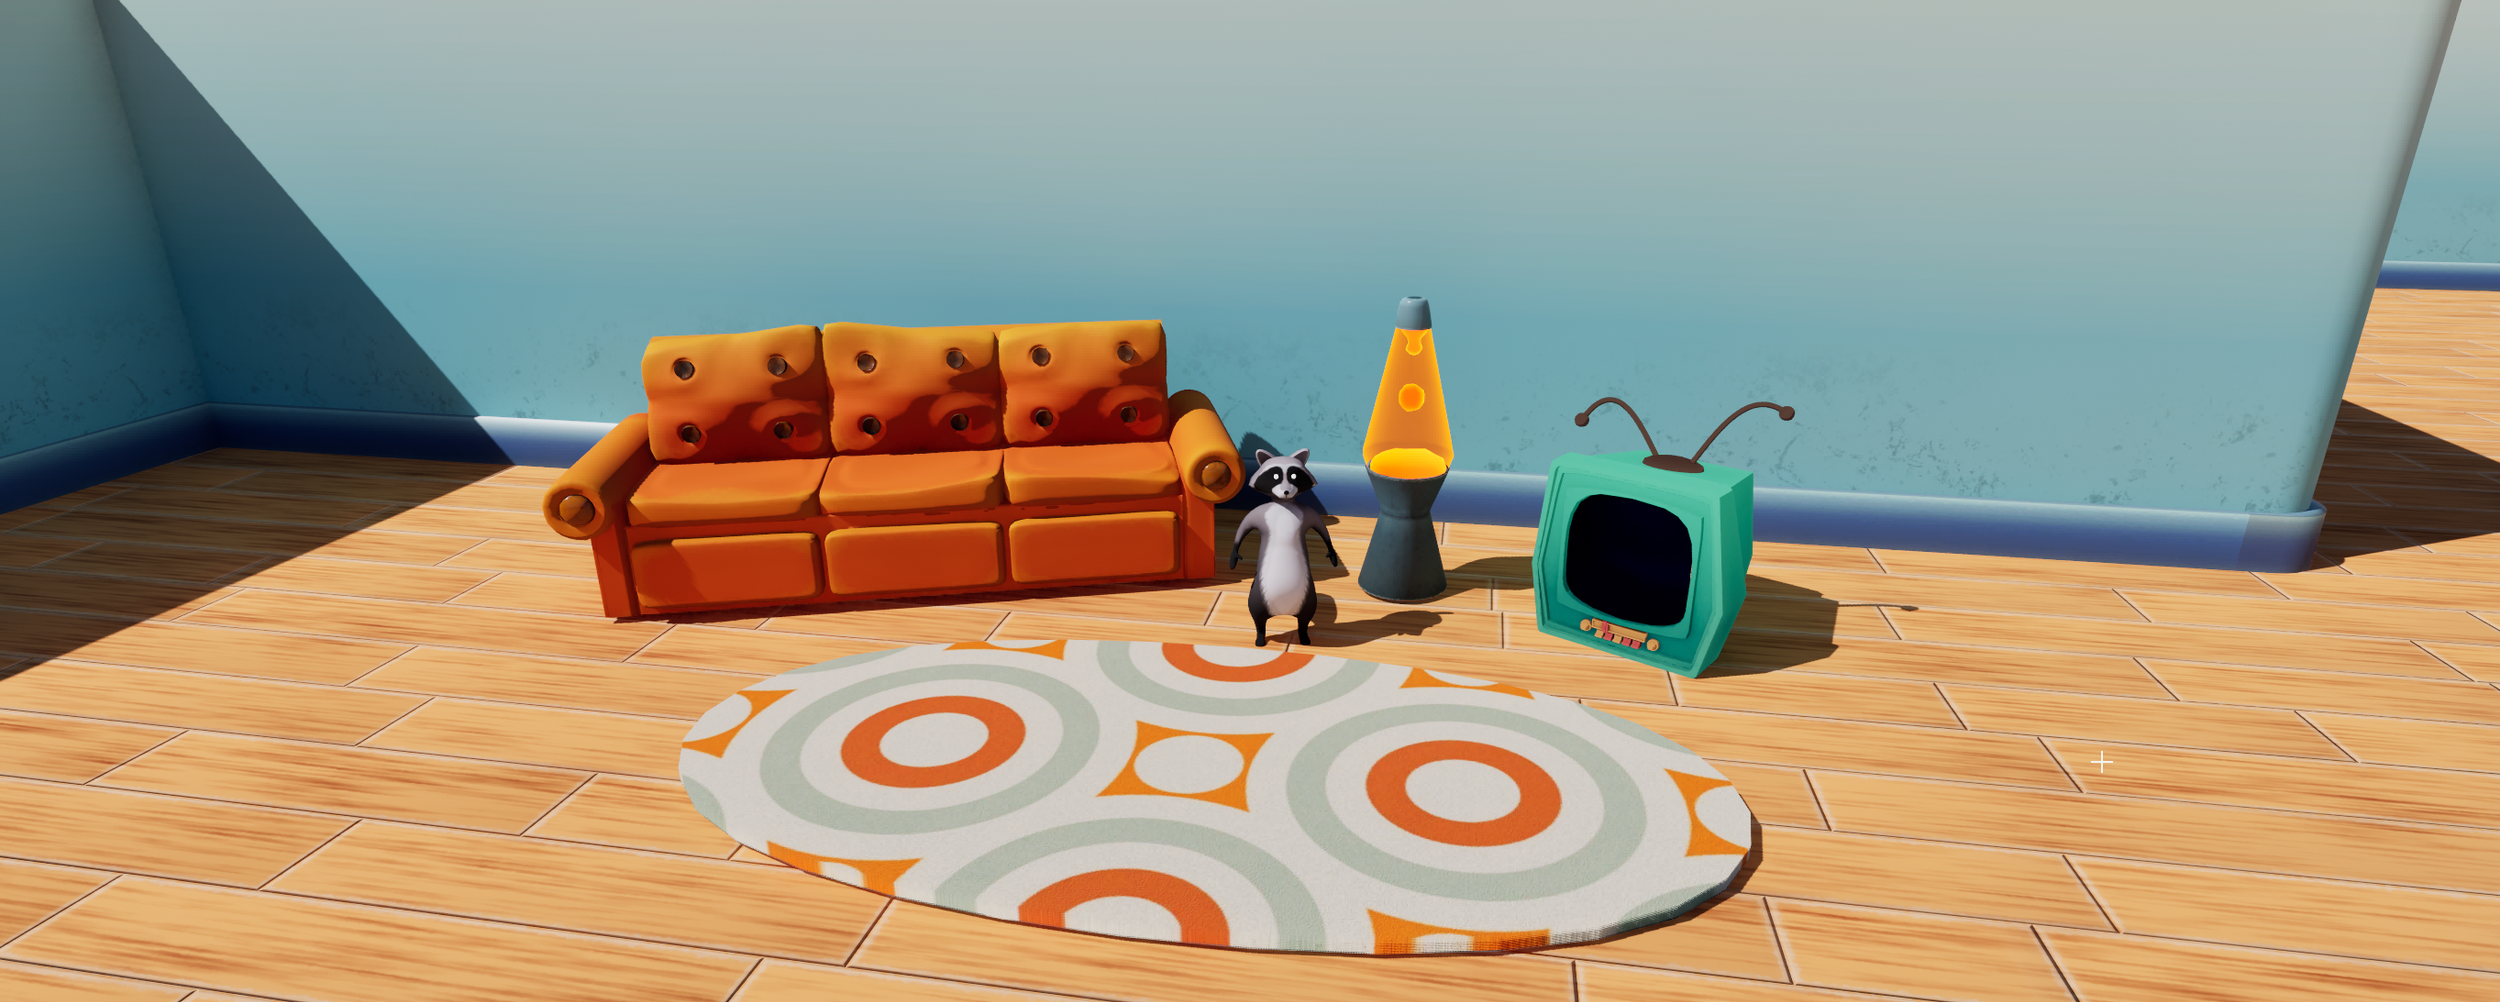
Some of the assets I made for “Project Raccoon”
Early on, the designers requested a way to easily place flagstones and fence pieces in the front yard. My suggestion was to build a tool to place static meshes across a spline, and they agreed. Since the spline tool was going to be used by non-technical people, it was important that it was not too complicated. It was also important that the tool was implemented quickly because without it the designers were spending too much time on minor tasks like manually placing individual rocks or fence posts.
The first step in making this tool’s blueprint was determining the total length of the spline by calculating the splines bounding box and breaking it into X, Y, and Z coordinates. Then I used those three values to set a spline length variable, which later spread static meshes across the spline. A spacing variable was added to the blueprint to allow the designers to set the distance between each mesh.

Initial spline calculation.
A For loop iterates through each section of the spline based on the SectionLength variable. This loop adds a static mesh to each part of the spline as defined by the earlier variable. I used the relative transform input to let the user set a rotation for the mesh.
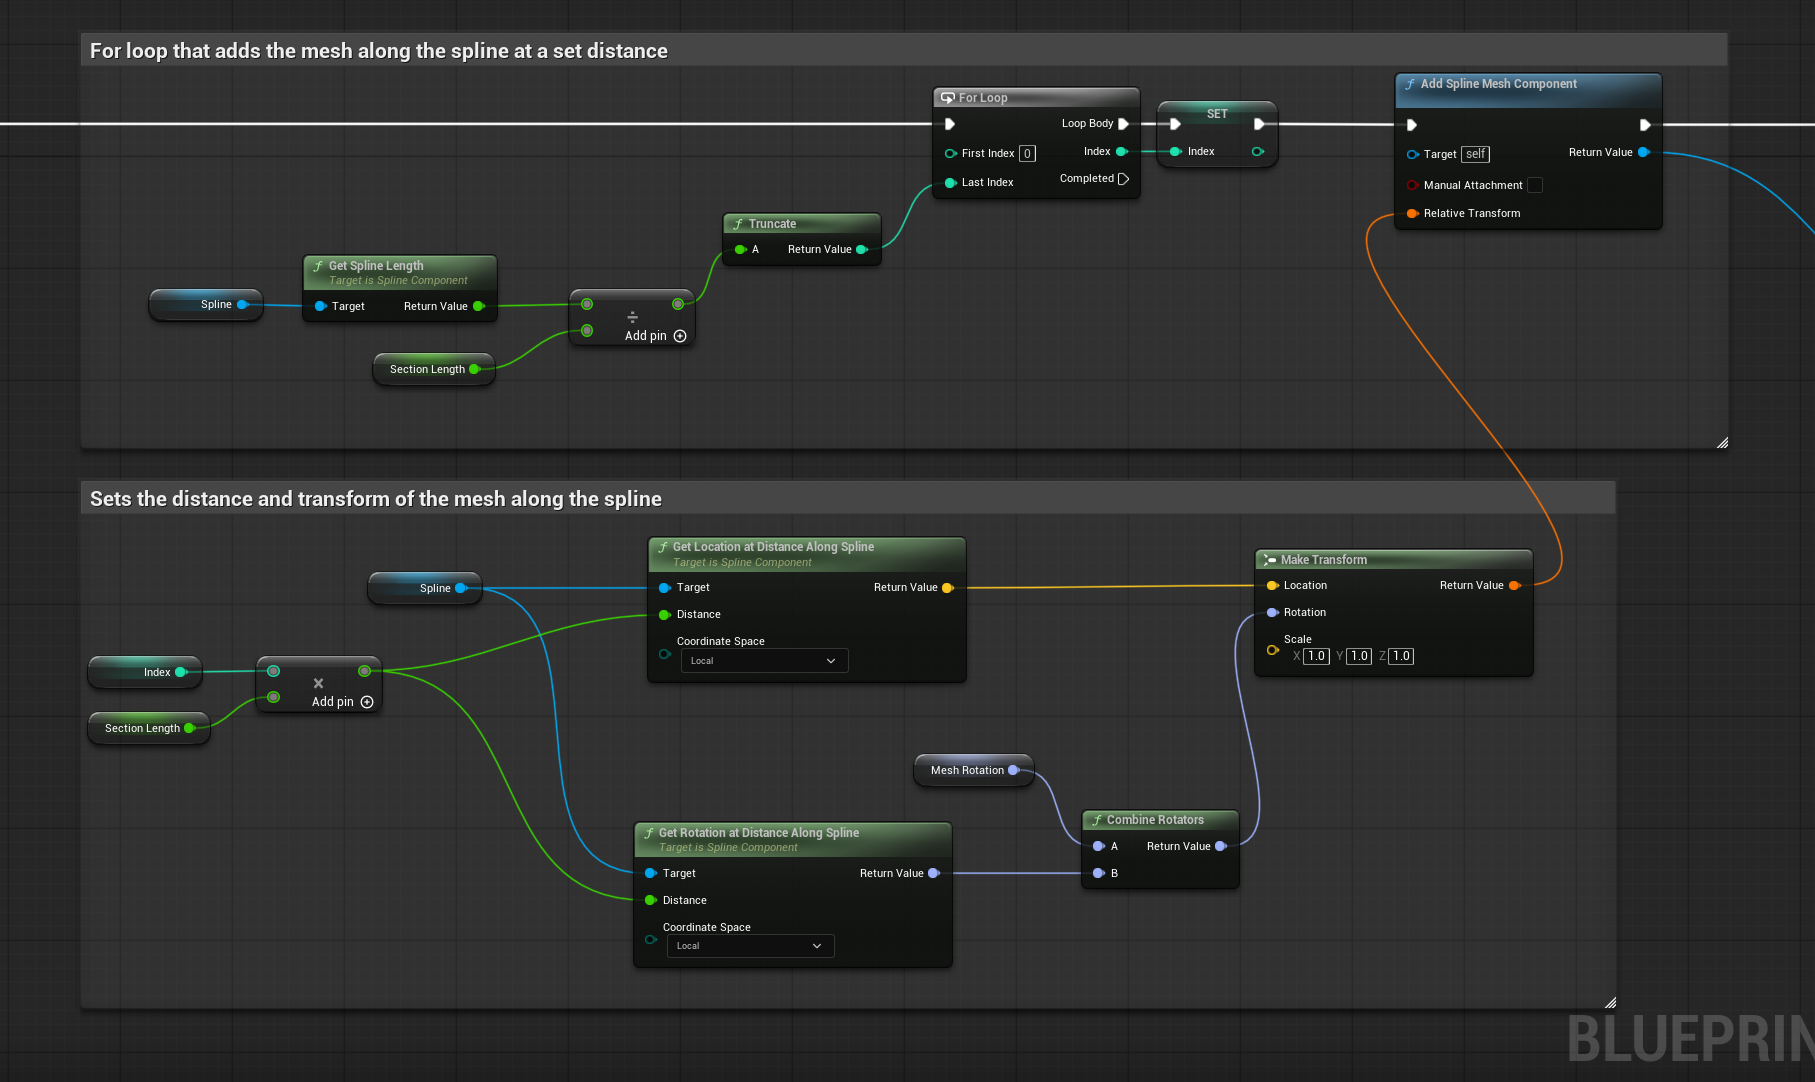
Loop logic that moves through the spline segments.
This last section defined the details for the meshes that are added to the spline. In the Set Collision Enabled node, I turned the collision type into a variable so the designers can change the collision settings within the blueprint. The video below demonstrates the spline tool in action. It works well, and the designers expressed their satisfaction after using the tool for a day. They came back and asked if there was a way to enable a setting that could connect all the meshes together to draw paths, roads, or ramps. Taking this feedback, I went back to the blueprint and got to work!
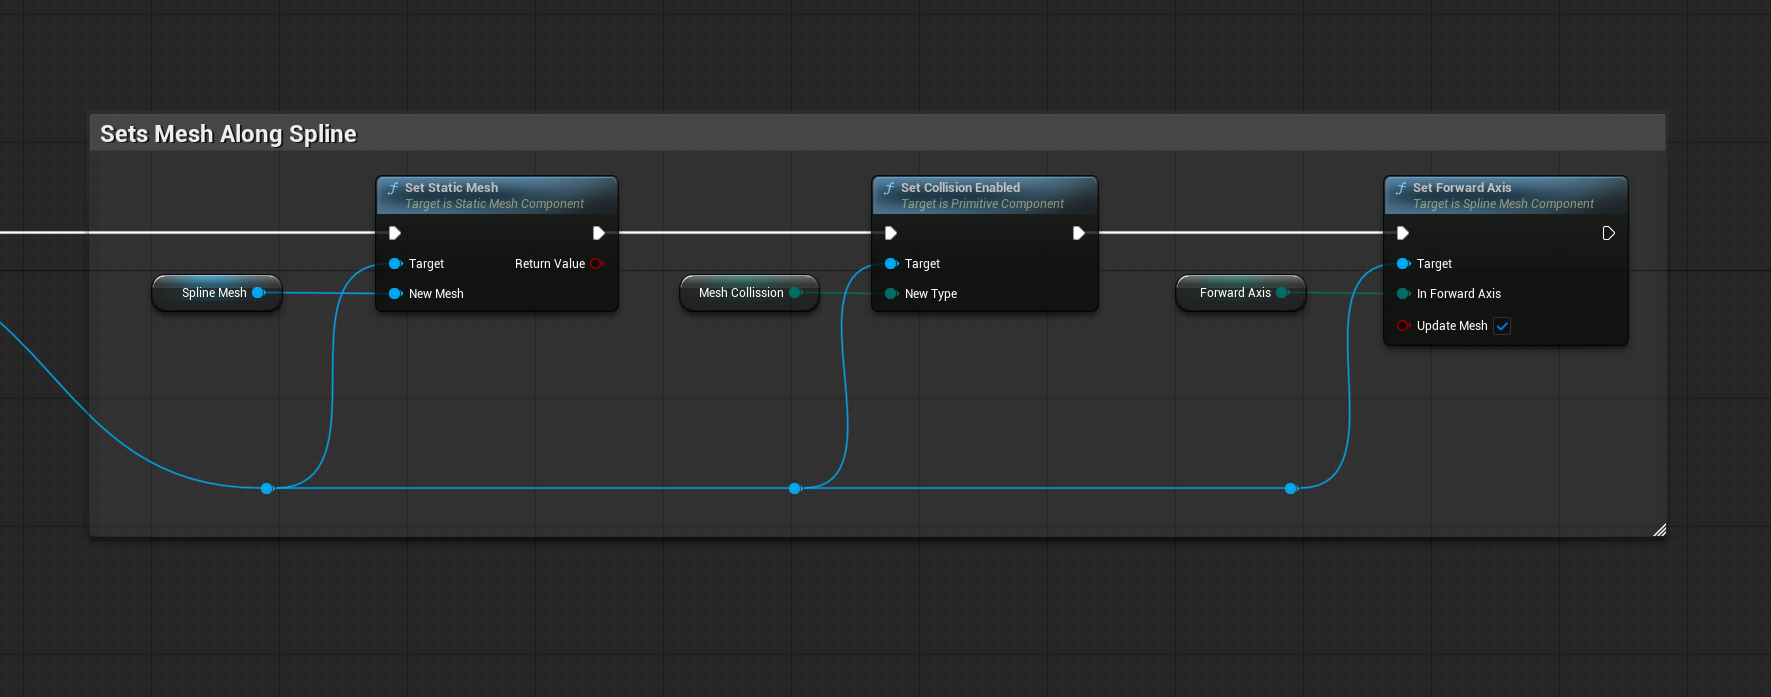
This section sets the details of the mesh
We named this new setting “Continuous Mode.” It would be easier for the user if a single blueprint handled both functions, so I set up a simple branch and boolean setup. Checking the “Space Meshes?” box separates each individual mesh, unchecking it connects them automatically.
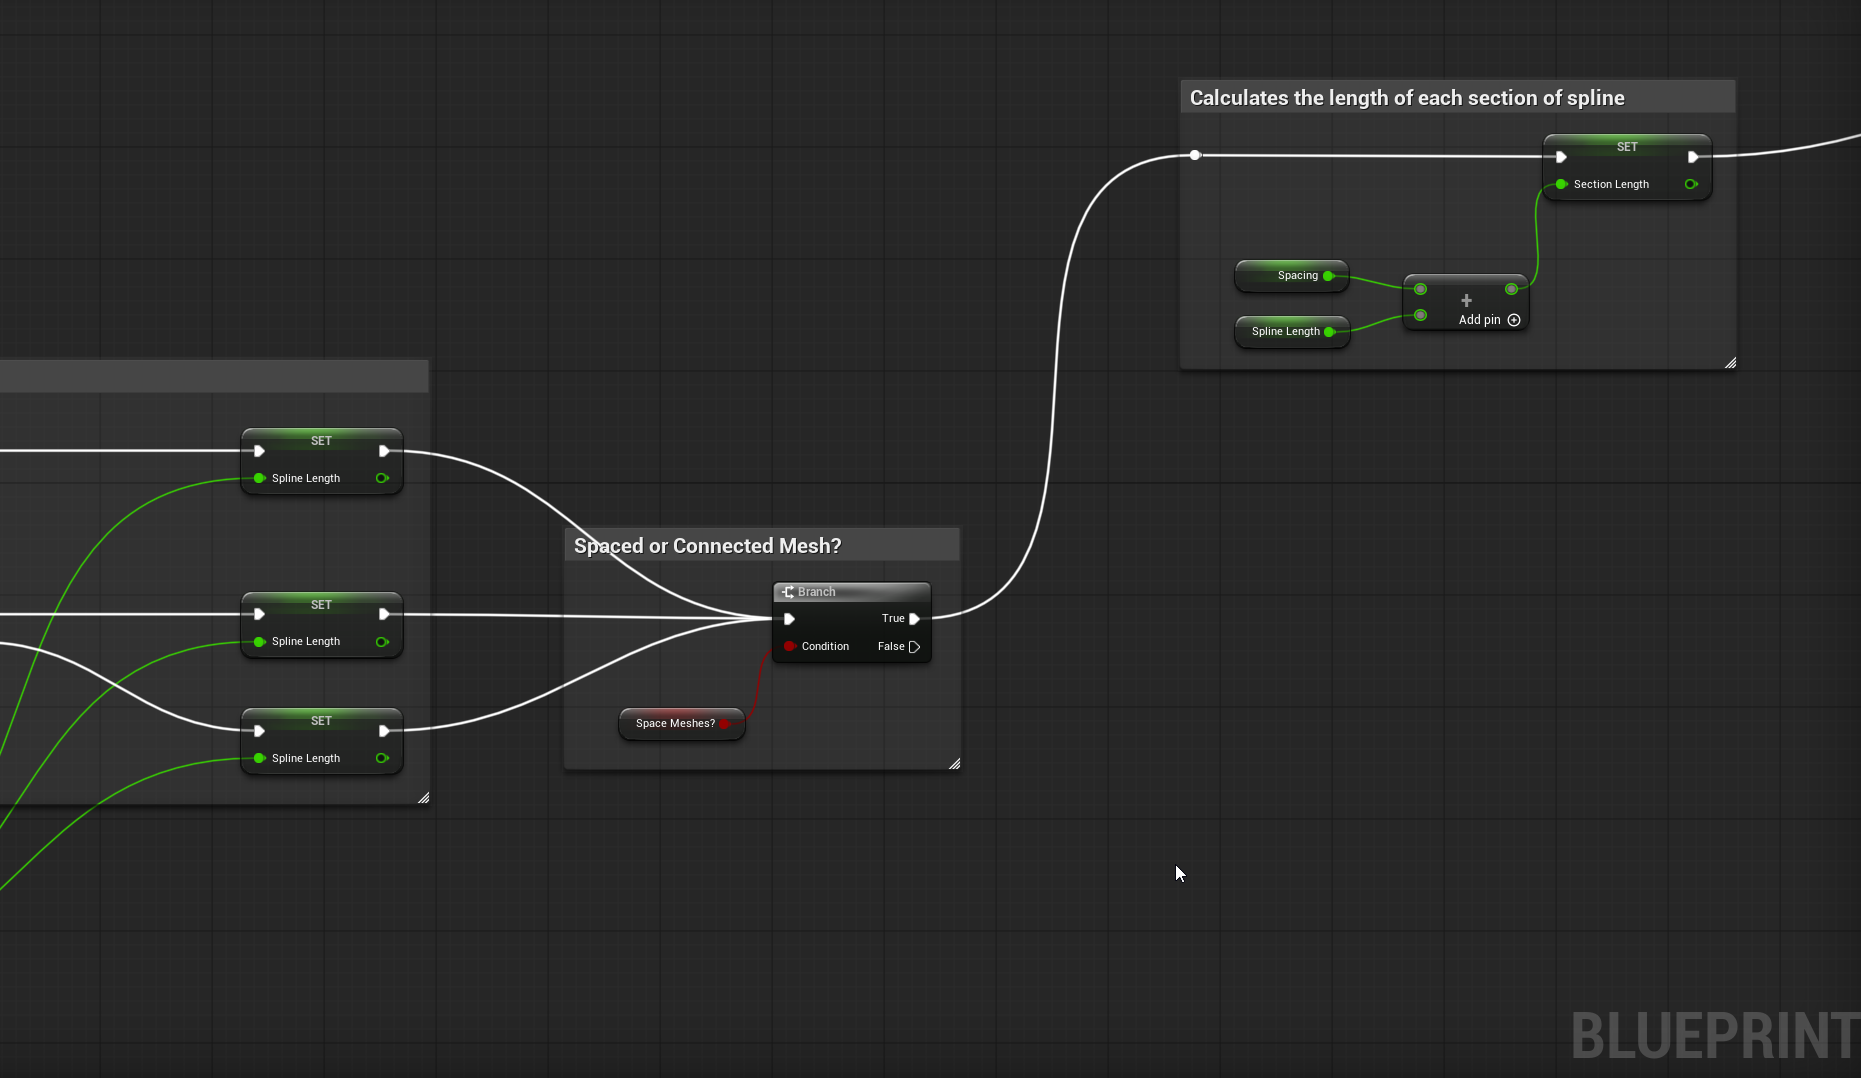
My very complicated switch logic
Since the connected meshes require no games, I skipped the length calculation and moved straight into the For Loop. This new For Loop connects to logic that places the mesh across the spline. Unlike the previous version, this logic ignores spacing. I found this final part the most challenging to solve. I used the Get Location and Tangent nodes to locate the start of the first and second objects. I then plugged those into a Set Start and a Set End node to define the boundaries of the spline mesh. Because this happens in a For Loop, the blueprint repeats this for each segment until it reaches the end. The Set Start and Set End nodes create a connected and seamless mesh.
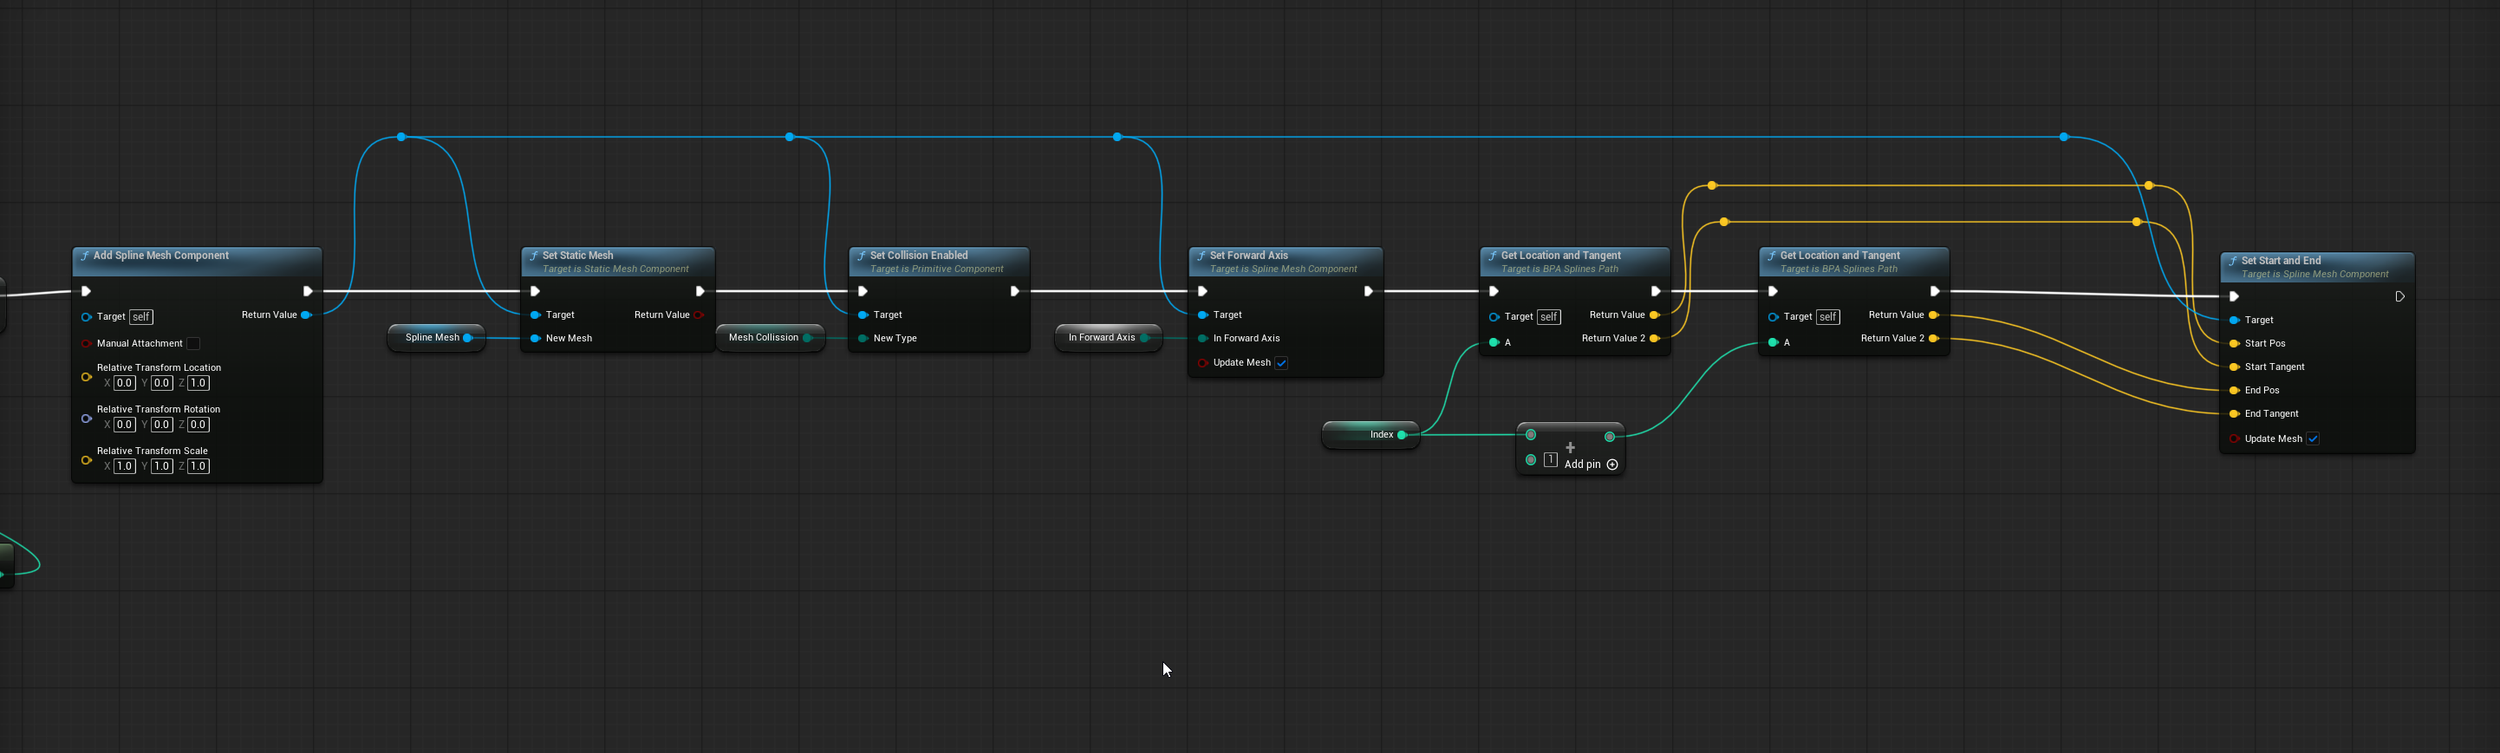
These nodes make the mesh blend across the spline
The two videos below show the tool working at runtime and demonstrate how the team applied a material to the spline to create a dirt path.
Even though the tool is relatively simple, I learned so much from creating it. My first takeaway was prioritizing designer workflow. It is my belief that delivering a good enough tool early, and then coming back later to improve it is better than delivering a perfect tool too late. I focused on getting a minimum viable product out to the designers so they could get on with their tasks. My second observation was the power of feedback loops. Expanding the tool from a simple mesh placer to a path generation tool happened entirely because of active collaboration with the team. Listening to the designer’s feedback pushed me to solve a more complex problem and ultimately made the tool better. On a personal note this project helped me further my understanding of manipulating objects in 3D space. Figuring out how to dynamically set start and end points for the spline mesh taught me how to set up seamless transitions, which is a skill that I can now apply to future projects.
I have been working on some abstract 3D art pieces that I will do a write up on soon. I also have a prototype game I’ve been working on that is a mix of Captain America and Windjammers. Once I get that to a better place, I really want to talk about it!
Thanks for reading!